The KSM Boot Sale scheduled for July 25 has been cancelled.
The popular and highly anticipated KSM Boot Sale, developed as a small-scale mini vendor venue for scale modellers, has been cancelled due to the current labour dispute at the facility and the resulting uncertainty surrounding venue operations.
This decision was made out of consideration for logistics, security, event planning stability, and the overall reliability of the venue situation. While the Boot Sale has generated strong interest from modellers, vendors, and club members, proceeding under uncertain circumstances would not provide the level of organization and confidence expected for a KSM event.
The Boot Sale was intended to provide a convenient, community-focused opportunity for scale modellers to buy, sell, trade, and connect in a smaller vendor-style setting. However, with the current labour dispute affecting the predictability of venue operations, cancelling this year’s event is the most responsible course of action.
Event Status
Status: Cancelled for this year Original Date: July 25 Reason: Current labour dispute at the facility and uncertainty surrounding venue operations Event Type: Scale modellers’ mini vendor venue Presented by: KSM Scale Modellers
Thank you for your understanding and for your continued support of KSM.
KSM SCALE MODELLERS • BUILDING COMMUNITY THROUGH HOBBY
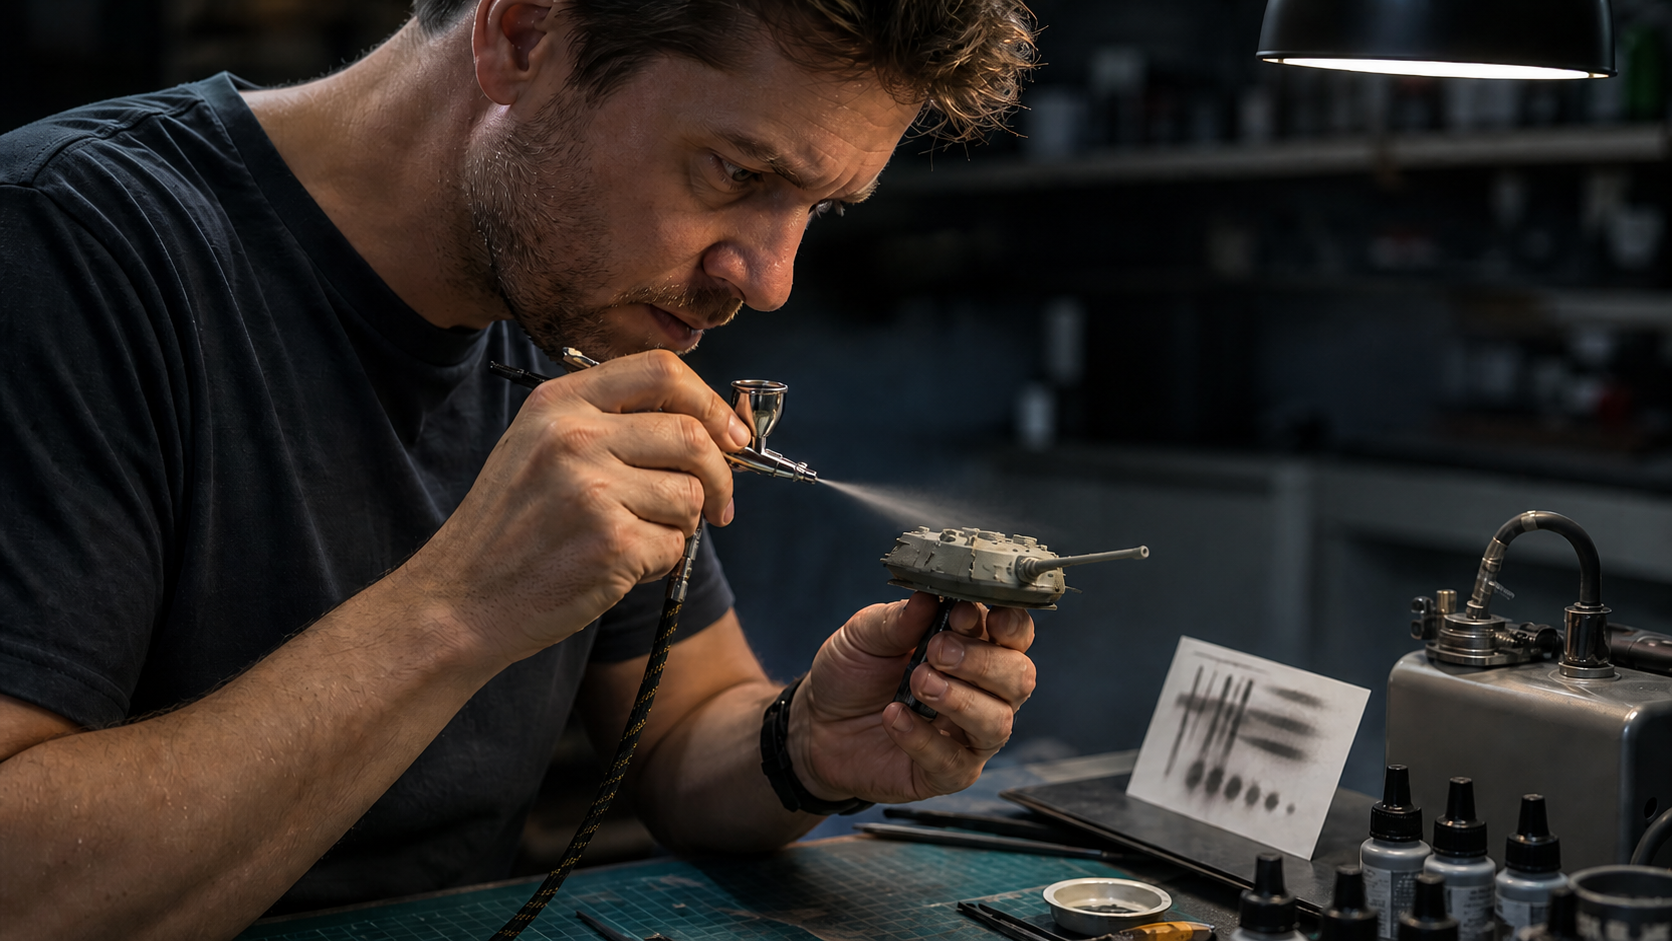
The Airbrushing Learning Curve: From Anxiety to Muscle Memory
Anxiety, tension, breath holding, and the moment muscle memory takes over.
Airbrushing is hard because it is not one skill.
It is several precision skills happening at the same time, under pressure, with very little room for error.
A brush gives direct contact. A pencil gives resistance against the paper. A knife blade gives tactile feedback through the hand. An airbrush gives almost none of that. The tool floats above the surface, and the result appears through an invisible chain of air, paint, distance, angle, movement, thinning, surface condition, and trigger control.
Core Doctrine: The modeller is not just painting. The modeller is trying to control an invisible system.
The Anxiety Comes From Uncertainty
The anxiety is real. It comes from the brain trying to manage too many variables before those variables have become automatic.
The Beginner’s Mental Stack
Is the paint too thin?
Is the air too strong?
Am I too close?
Am I moving too slowly?
Will it spider?
Will it pool?
Will the line blow out?
Will I ruin the model?
That stack of uncertainty creates tension in the hand, wrist, shoulder, neck, jaw, and breathing. The body braces for failure before the paint even hits the surface.
That is why so many people hold their breath. Breath holding is the body trying to freeze movement. The brain thinks, “If I stop everything, I will be more accurate.” But airbrushing does not work that way.
Failure Mode: A frozen body does not create control. It creates rigidity. The hand stiffens, the wrist locks, the trigger finger becomes clumsy, and the pass becomes hesitant. Airbrushing punishes hesitation.
The Airbrush Demands Coordination
A double-action airbrush requires several things to happen together: air control, paint control, hand movement, distance control, and surface reading.
Air Control
Air begins the sequence. It stabilizes the spray pattern before paint is introduced.
Paint Control
Paint must be fed, not dumped. The trigger finger has to meter flow independently.
Surface Reading
The modeller must read sheen, wetness, edge quality, and coverage as the surface develops.
The trigger finger must move independently from the hand. The hand must move smoothly while the finger meters paint. The wrist must stay loose. The shoulder must not drive the whole movement like a club. The eyes must read the surface as the paint develops.
Most new users treat the airbrush like a tiny spray can. That is the first mistake. A good airbrush is closer to a musical instrument, a fountain pen, or a precision cutting tool. It responds to tiny movements and exposes hesitation immediately.
The difficulty is not that the tool is mysterious. The difficulty is that the tool is honest.
Tension Creates the Failures the Modeller Is Trying to Avoid
The cruel part is that tension creates the very mistakes the modeller fears.
A tense hand moves unevenly.
A tense trigger finger dumps paint instead of feeding it.
A tense wrist creates hooks, blobs, and stop-start marks.
A tense shoulder turns fine control into brute movement.
A tense breathing pattern destroys rhythm.
The airbrush rewards flow. It rewards relaxed repetition. It rewards a controlled sequence, not fear.
That is why the first real battle in airbrushing is not the paint. It is the body.
The Sequence Must Become Automatic
The core sequence is simple, but it has to become automatic before the modeller can relax.
air on → move → paint on → paint off → keep moving → air off
At first, the modeller has to think through every part of that sequence. That is mentally exhausting.
The brain is trying to command the finger, the hand, the wrist, the breathing, the distance, the paint flow, and the surface read all at once. That is where the anxiety comes from. The modeller is trying to think through movements the hand has not yet learned.
Before Muscle Memory, the Airbrush Feels Like a Threat
Before muscle memory, the airbrush feels dangerous. Too many variables. Too much consequence. Too much fear of ruining the surface.
Every pass feels loaded. Every movement feels overthought. The model becomes the battlefield, and the modeller starts performing under pressure instead of practicing with purpose.
Diagnostic Indicator: Breath holding, clenched hands, stiff shoulders, trigger panic, and hesitation are not signs that the modeller lacks talent. They are signs that the body has not yet learned the job.
After Muscle Memory, the Tool Becomes Readable
After muscle memory begins to form, the same airbrush becomes readable. You stop guessing. You stop hoping. You start seeing.
The spray pattern tells you what is happening. The surface sheen tells you if you are too wet. The edge tells you if you are too close or too far away. The trigger tells your finger where the paint begins. The MAC valve gives the hand finer command over air volume. The test card becomes a diagnostic instrument instead of a scrap of plastic.
The airbrush stops feeling like a dangerous little machine. It starts behaving like an extension of the hand.
That is the turning point: the airbrush stops being a threat and becomes a readable instrument.
Test Cards Are Not Optional
Practice away from the model matters. Test cards are not childish. They are calibration.
They remove the fear of ruining the subject and allow the body to learn without consequence. Lines, dots, fades, mottling, edge control, trigger starts, trigger stops, and translucent passes build physical literacy.
TechNote: The model is not the place to learn basic control. The model is where practiced control is applied. A modeller who skips drills transfers the learning curve directly onto the finished subject.
The Real Problem Is Usually Not Talent
Most people think they are bad at airbrushing. Usually, they are not bad. They are under-trained.
They have not built enough trigger memory.
They have not practiced distance control.
They have not learned how thin paint behaves.
They have not developed surface-reading skills.
They have not repeated the same movement enough times for the body to trust itself.
So every pass feels like a gamble. That gamble feeling is what creates anxiety. Practice removes the gamble.
Muscle Memory Turns Anxiety Into Control
Airbrushing becomes stressful when the modeller is trying to think through movements the hand has not yet learned.
Muscle memory changes that. The sequence becomes automatic. The body stops bracing. The hand loosens. The breathing returns. The trigger finger becomes more independent. The modeller begins to manage paint, air, distance, and movement without conscious panic.
That does not mean the airbrush became easier. It means the modeller became calibrated.
Bench Standard
Airbrushing is not magic. It is a controlled physical skill.
The bridge between knowledge and skill is practice.
The bridge between skill and mastery is time.
Until muscle memory develops, airbrushing feels tense because the brain is doing too much live calculation. Once muscle memory takes over, the body manages the fundamentals automatically, freeing the mind to focus on finish quality, surface response, and artistic intent.
Airbrushing becomes control when the hand finally knows what the mind has been trying to explain.
Frequently Asked Questions
Common questions about airbrushing anxiety, breath holding, trigger control, and the role of muscle memory.
Why is airbrushing so hard for beginners?
Airbrushing is hard for beginners because it requires several skills at the same time: trigger control, air control, paint flow, hand movement, distance control, and surface reading. Until those movements become automatic, the brain has to think through every step, which creates tension and uncertainty.
Why do people hold their breath while airbrushing?
People often hold their breath while airbrushing because the body is trying to freeze movement and become more accurate. The problem is that breath holding usually creates stiffness, making the hand, wrist, and trigger finger less controlled.
What causes airbrushing anxiety?
Airbrushing anxiety usually comes from uncertainty. The modeller is worried about spidering, pooling, overspray, paint blowing out, or ruining the model. That fear makes the body tense, which often creates the exact mistakes the modeller is trying to avoid.
How does muscle memory improve airbrushing?
Muscle memory improves airbrushing by making the core sequence automatic: air on, move, paint on, paint off, keep moving, air off. Once the hand learns that rhythm, the modeller can focus on surface response and finish quality instead of consciously managing every movement.
Are test cards useful for airbrushing practice?
Yes. Test cards are essential because they let the modeller practice lines, dots, fades, mottling, trigger starts, trigger stops, and paint control without risking the model. They turn practice into calibration.
Is airbrushing difficult because of lack of talent?
Usually, no. Most airbrushing difficulty comes from under-training, not lack of talent. The hand needs repetition before it can control the airbrush confidently. Practice removes the gamble.
Protecting fine moulded-in kit texture is not a matter of paint fashion. It is a matter of film build. Rivets, weld beads, rolled plate character, cast texture, bolt heads, cast numbers, and sharp styrene edges are not usually destroyed by one coat. They are buried layer by layer. The coating system that reaches the visual target with the least unnecessary material left behind is the correct system.
Bench Standard Verdict
When the objective is to preserve fine moulded-in kit texture, lacquer is the benchmark medium. It lays down a tighter, thinner, more obedient paint film and allows colour to be built gradually without smothering rivets, welds, casting texture, rolled plate character, and sharp styrene edges. Aqueous paint can work. That is not the issue. The issue is operating window. Lacquer gives the modeller a broader, safer, more controllable path to ultra-lean film build. Aqueous paint is easier to overstack, easier to overbuild, and easier to push into softness when coverage becomes the target.
Lacquer is fuse paint. Aqueous is stack paint.
Why This Matters
Fine surface detail does not usually disappear because one coat of paint touched the model. It disappears because the model is slowly buried under unnecessary film thickness. Primer, colour, correction passes, and clear coats all add mass. Once enough material builds up, the surface stops reading like steel, cast metal, rolled armour, or crisp styrene and starts reading like softened plastic wrapped in paint. The best paint system is therefore the one that reaches the visual target with the least material left behind. That is lacquer.
Doctrine
Paint should preserve surface information, not replace it. Every coat must justify its existence.
Section I — Film Logic
Lacquer
Lacquer behaves like a fused film system. It atomizes finely, settles tightly, and permits highly reduced translucent application while still remaining visually coherent. That allows the modeller to creep up on colour instead of dumping it on. Each pass can remain lean, controlled, and subordinate to the surface beneath it.
Aqueous
Aqueous paint behaves more like a stacked film system. It builds by accumulation more obviously, and in practice it often requires more deposited mass to reach the same visual endpoint. That does not make it unusable. It makes it less efficient when the task demands maximum texture retention with minimum film build.
Diagnostic Indicator
If the model looks smoother after painting than it did in bare styrene or after restrained priming, the coating system is too heavy, the application is too wet, or both.
Section II — What Actually Buries Detail
The usual culprit is not the final colour coat alone. The damage is almost always layered in over time. A heavy primer coat starts filling shallow texture. A second pass “for safety” rounds edges further. The colour coat goes on too wet because the modeller is chasing instant coverage. Another pass follows because one area still looks light. Then the clear coat arrives and seals the burial. That is how detail dies. Not dramatically. Methodically.
Failure Mode
“It only needed one more pass.” That sentence has buried more kit texture than bad plastic ever did.
Section III — Application Doctrine
Prime for grip, not for bulk. Primer is a functional layer, not a body filler.
Build colour translucently. The objective is disciplined accumulation with minimal deposited mass.
Stop chasing coverage. Uniformity is not victory. Preservation is victory.
Keep the surface in charge. Paint must remain subordinate to the model’s existing surface language.
Doctrine
Primer is a diagnostic film, not a comfort blanket.
Diagnostic Indicator
Fine moulded detail should look painted, not padded.
Section IV — Failure Modes
Coverage Chasing: repeated passes to eliminate tonal inconsistency bury detail.
Primer as Filler: shallow relief is dulled before the colour stage begins.
Wet-Coat Thinking: scale surfaces are treated like 1:1 automotive panels.
Aqueous Overstacking: film mass accumulates one innocent pass at a time.
Clear Coat Burial: disciplined colour work is ruined by heavy varnish.
Wrong Visual Target: too much paint is applied in pursuit of false perfection.
Failure Mode
A beautiful paint type sprayed badly is still a bad coating system.
Section V — Why Lacquer Wins
Lacquer wins because it permits control at lower deposited mass. It tolerates stronger reduction. It atomizes more cleanly. It remains visually coherent in thin translucent passes. It makes gradual colour build easier. It lets the modeller stop sooner. The winning system is the one that reaches the visual result with the least material on the model.
Doctrine
The winning system is the one that reaches the visual result with the least material on the model.
Section VI — Where Aqueous Still Belongs
Aqueous paint still has legitimate uses. It can be effective for detail painting, brushwork, selected filters, softer transitions, and situations where solvent aggression is undesirable. But that is not the same question. This Bench Standard is not asking whether aqueous paint can be made to work. It is asking which medium produces the thinnest paint film for protecting fine moulded-in kit texture. The answer remains lacquer.
Diagnostic Indicator
If the finish needed repeated passes before it started to look “right,” film build likely became part of the price.
Section VII — ModelWorX Bench Rules
Use the lightest primer coat that still does the job.
Use lacquer for main colour work when preserving fine detail is the priority.
Build opacity slowly through controlled translucent passes.
Never let “full coverage” outrank surface preservation.
Treat clear coats as another burial risk, not an automatic finishing step.
If the surface looks softer after painting, the paint system failed the model.
Bench Standard Conclusion
For fine moulded-in texture, lacquer is the superior coating system because it leaves less unnecessary material behind while giving the modeller tighter control over film build. Aqueous paint can be used successfully, but it is more vulnerable to stacking, overbuilding, and gradual loss of surface definition when coverage becomes the goal. The serious modeller does not paint to hide the model. The serious modeller paints to preserve it.
Fine detail does not need more paint. It needs less paint, applied with more intelligence.
Scale Modelling Masking: Tamiya Tape, ORAMASK 810 and Airbrush Markings
Masking failures are not morality tales about tape. They are process failures created when a gap, an airstream, and a mobile paint film meet at the same moment. Control those three variables and masking stops being drama and starts becoming a finishing system.
Tamiya tape has the wider operating envelope. It curves better, settles better, and forgives more bad behaviour.
ORAMASK 810 is stronger for hard-edged insignia, serials, tactical symbols, and crisp stencil geometry.
Lacquer punishes sloppy masking more aggressively because it atomizes finer, stays mobile longer at the edge, and bites harder.
The MAC Valve matters because it controls delivered airflow at the brush, not just tank pressure at the regulator.
Masking success depends on edge burnish, spray direction, airflow control, dilution discipline, and restrained film build.
The goal is not brute opacity. The goal is a marking that looks painted into the surface rather than stacked on top of it.
Why Professionally Designed and Cut Masks Matter
Professionally designed and cut masks are not a convenience product for weak technique. They are a finishing tool for modellers who care about geometry, film control, and surface integration. A serious modeller is not simply trying to get a marking onto the model in roughly the right shape. The objective is a marking with cleaner edges, lower paint build, tighter spacing, and a result that behaves like paint because it is paint.
That is the real difference between a mask and a decal. A decal can reproduce artwork. A mask allows the marking to become part of the finish system itself. Reflectivity, texture, weathering response, and optical behaviour stay in the same family as the surrounding paintwork. Even when a sprayed marking has slight tonal variance or minor human irregularity, it often looks more convincing because the imperfection belongs to the painted object rather than to an added film trying to disappear.
Professionally designed and cut masks are not a shortcut. They are a higher standard.
1. Mask Material Doctrine: Not All Masks Fail the Same Way
Masking materials are not interchangeable. They do not all fail for the same reasons, and they do not behave the same way with lacquer and water-based acrylic. The first mistake many modellers make is treating all masks as if they only differ in price. They differ in structure, flexibility, tack behaviour, edge response, and tolerance for bad airflow decisions.
Tamiya Masking Tape
Tamiya tape is thin, conformable, and forgiving. In real bench use, that means it settles well over subtle surface variation, curves more willingly, and is generally more tolerant of imperfect operator behaviour. Its washi-paper character gives it a broader working envelope, especially when lacquer is involved.
Best for curves, compound shapes, and mixed-surface work
More forgiving around rivets, shallow detail, and uneven surfaces
Better choice when your workflow is still being refined
Usually the safer answer when lacquer risk is high
ORAMASK 810 Vinyl
ORAMASK 810 is a low-tack stencil film built for precision masking. It offers excellent visibility of the substrate and strong geometric definition, but it is still a non-porous vinyl film. If airflow gets aggressive and paint remains mobile, vinyl will not save sloppy technique. It rewards accuracy more than it forgives error.
Best for hard-edged insignia, serials, codes, and stencil geometry
Excellent visual clarity during placement
Less forgiving on compound curves and broken surface detail
Rewards disciplined spray control and restrained passes
Bench Rule
Use the mask that matches the job, not the one you happen to be holding.
Mask Chooser: Use the Right Material for the Job
Task
Best Choice
Why
Curves and soft compound forms
Tamiya tape
Conforms better and tolerates imperfect geometry
National insignia and hard-edged markings
ORAMASK 810
Crisp stencil logic and strong shape fidelity
Rivets, weld seams, broken surface detail
Tamiya tape
Settles more willingly and punishes less
Serials, codes, and sharp letterforms
ORAMASK 810
Better visual registration and clean linear edges
High-risk lacquer work
Tamiya tape
Broader operating envelope under stressful conditions
Large flat fields and stencil-type layouts
ORAMASK 810
Stable geometry and easy placement visibility
Operator still refining spray control
Tamiya tape
Forgives more bench error
2. Why Masks Fail: The Fluid-Dynamics Version
Paint does not mysteriously sneak sideways under tape. It is driven there. For bleed to occur, three things must exist at the same time: a gap, energy, and a mobile paint film. Remove any one of those and the failure stops.
A gap — microscopic is enough
Energy — airflow volume and nozzle velocity
Mobile paint — thin paint plus active solvent
That is why masking cannot be reduced to tape brand arguments. Tape matters. Surface prep matters. Cure matters. But when the brush is driving a wet film into an edge with too much energy, the operator has already created the failure mechanism.
The gauge does not tell you what the nozzle is doing in reality.
3. Lacquer Versus Water-Based Acrylic at the Mask Edge
Lacquer is not dangerous because it is evil. It is dangerous because it is efficient. It atomizes finer, stays mobile at the edge, and chemically bites into what is underneath. That means lacquer failures often look darker, wetter, glossier, and more intrusive. Water-based acrylic is generally more forgiving under a mask, not because it is better, but because it is coarser and less eager to run into microscopic gaps with the same aggression.
Paint Type
Edge Behaviour
Typical Failure Signature
Lacquer
Fine atomization, high mobility, solvent bite
Directional undercut, dark edge stain, ghost halo, aggressive bleed
Pebbling, bridging, softer edge fuzz, less chemically intrusive failure
Doctrine Note
Lacquer exposes every mistake faster. That does not make it the wrong medium. It means your masking process has to be worthy of it.
4. Full Bench Workflow: How to Mask and Spray Markings Properly
This is the practical sequence that keeps masking under control. Skip steps, compress cure time, or chase opacity with wet passes and the process degrades quickly.
Start with a clean, stable surface. Dust, sanding residue, skin oils, and semi-cured paint undermine edge sealing and increase lift risk.
Let the underlying paint cure properly. Touch-dry is not the same as cured. A surface that feels dry can still be vulnerable to adhesive pull and solvent attack.
Choose the right masking material for the shape. Do not force vinyl to behave like kabuki paper, and do not expect kabuki tape to deliver complex stencil geometry as cleanly as a purpose-cut vinyl mask.
Apply the mask without tension. Stretched masks try to recover. Recovery creates lift, distortion, or edge instability.
Burnish the edge, not the whole field. The edge seal matters. Overworking the full mask area adds little benefit and increases the chance of distortion or unwanted adhesive contact.
Spray a light sealing pass first. This can be a dry mist of the base colour or a very restrained first pass of the marking colour. The aim is to establish the edge, not flood it.
Spray away from the edge first. Do not lead with a pass that drives paint directly into the mask boundary. Approach the edge with discipline.
Build the colour gradually. Several light passes are safer than one wet pass. Masked markings fail when the operator chases opacity with volume.
Control airflow at the brush. This is where the MAC Valve becomes decisive. Lower destructive edge energy, reduce the initial hit, and keep the spray cone under control.
Watch film build as closely as colour density. A marking can be perfectly sharp and still fail because it sits as a raised patch on the surface.
Remove the mask when the paint has set, not days later. Leave it too long and the film hardens around the edge, increasing the chance of ridge formation or mechanical tearing.
Inspect under raking light. A marking that looks fine head-on may still show a paint terrace, shadow line, or hidden edge contamination under side light.
5. Failure Ladder: Read the Edge Correctly
Not every imperfect edge means the same thing. Read the failure properly and the solution becomes obvious.
Soft feathered edge — mild diffusion, often acceptable, usually the result of light overspray or a less aggressive film
Directional undercut — airflow was too strong or the pass was too wet and driven into the edge
Ghost edge or stain halo — solvent migrated and marked the boundary even if the hard bleed was limited
Paint lift — underlying coat was not cured enough, adhesion was poor, or the mask bonded more aggressively than the substrate could tolerate
Raised terrace — colour coverage was achieved by piling on paint instead of building a restrained integrated film
Diagnostic Indicator
Masking failures are more often process failures wearing a materials costume.
6. Why the MAC Valve Changes Everything
The regulator controls system pressure. The MAC Valve controls delivered airflow at the brush. That difference is not trivia. It is the breakthrough. Instead of making coarse compressor-side adjustments and hoping the spray behaviour follows, the modeller can keep the supply steady and reduce destructive energy exactly where it matters: at the edge.
It softens the initial trigger hit
It reduces the chance of blasting the mask edge open
It allows a dry sealing mist before the main colour pass
It makes low-build masking work more repeatable
It turns edge control from guesswork into process
If airflow is not controlled, tape is irrelevant.
7. Paint Film Accumulation: The Problem Is Not Just Edge Sharpness
Every decal is a film. Every sprayed marking is also a film. The difference is that decal thickness becomes obvious when carrier film, silvering, or trapped air reveal it, while sprayed markings often hide their own thickness until side lighting, macro photography, or weathering exposes the step.
This is the missing connection many modellers overlook. You can produce a sharp marking and still fail the finish if the paint stack is too high. Spray an RAF roundel, multi-colour insignia, or tactical marking with brute-force opacity and every colour ring becomes another physical layer. The marking may be sharp, but it no longer looks integrated.
Reduce the paint enough to build opacity gradually
Apply light passes and allow each to flash off
Stop when the colour reads correctly, not when it becomes brutally solid
Judge under raking light, not only under direct bench light
Bench Standard
The best sprayed marking is not the one with the hardest edge or the strongest colour. It is the one that still looks painted into the vehicle rather than painted on the vehicle.
8. Tape Edge Test: A Simple Way to Judge Paint Build
One of the simplest ways to estimate paint film thickness is to use masking tape as a temporary height gauge. Spray across a tape edge on a test card or scrap panel exactly as you would a marking. Remove the tape once the paint has set enough to handle cleanly. The remaining edge becomes a witness line.
If the transition is subtle and only just visible under raking light, the film build is in the right zone.
If the edge reads as a hard ridge, catches a fingernail, or throws a shadow, the paint was applied too heavily.
If it looks acceptable head-on but turns into a terrace under macro light, the paint stack is already too high.
How to Use It as a Training Drill
Run the same test repeatedly. Spray one strip too dry, one too wet, one controlled, and one built in several very light passes. Remove the tape and compare the edges under strong side lighting. Very quickly, the relationship between dilution, trigger discipline, airflow, and film height becomes visible. The tape edge stops being opinion and becomes evidence.
Bench Rule
Practice until the tape edge tells the same story every time.
9. Why Airbrushed Markings Still Matter
Airbrushed markings carry an authority decals can imitate but never truly equal. A sprayed marking is made of paint. It shares the same surface character, the same response to weathering, the same reflectivity, and the same optical family as the surrounding finish. That matters. The marking stops looking applied and starts looking native to the vehicle.
That does not mean decals have no place. It means the serious modeller should understand what is being traded. Decals offer convenience and graphic precision. Masks offer surface integration and painted authenticity. For modellers who care about how the finish reads under light, that is not a small difference. It is the whole argument.
Companion Reading
This page is the doctrine piece. Use the companion pages for troubleshooting and airflow-specific follow-up.
Professionally designed and cut masks do not rescue weak technique. They reward disciplined technique. In capable hands, they support cleaner geometry, lower-risk spraying, restrained film build, and markings that belong to the finish rather than sitting on top of it.
Airbrush Masking FAQ: Tamiya Tape, ORAMASK 810, Markings and Airflow Control
This page is the bench-side quick-reference companion to the full masking article. Read the doctrine once. After that, come back here and go straight to the problem sitting in front of you.
Masks do not fail by magic. They fail when a gap, airflow energy, and mobile paint film meet at the same edge.
The main article carries the full doctrine: why professional masks matter, how Tamiya tape differs from ORAMASK 810, why lacquer punishes weak edge control harder than water-based acrylic, how a MAC Valve changes delivered airflow, and why paint-film thickness matters just as much as a clean edge.
This FAQ is for diagnosis, recovery, and blunt bench answers.
This Page Answers the Questions the Bench Actually Asks
Why did paint get under the edge?
Because the edge gap, airflow energy, and wet paint film were allowed to work together.
Why did the mask lift paint?
Because the paint underneath was not cured hard enough, not bonded well enough, or the mask was too aggressive for the surface.
Why does the marking still look wrong?
Because a sharp outline alone is not enough. Excess paint film leaves a ridge, kills scale effect, and gives the game away.
Section 1
Fundamentals
Start here if you want the short operational truth before the deeper troubleshooting.
Why does paint bleed under a mask?
Paint does not mysteriously crawl sideways under tape. It is driven under the edge. For bleed to happen, three things must exist at the same time: a gap, airflow energy, and a mobile paint film. Remove any one of those and the failure stops.
That is why bleed is not just a tape problem. The edge was weak, the pass was too wet, the angle was wrong, or the air hit harder than the operator realized.
Is masking failure a tape problem or an airflow problem?
Usually both, but airflow decides how brutally the mistake gets exposed. A forgiving material such as Tamiya tape can survive mediocre technique longer. A less compliant masking film can expose operator mistakes much faster.
Material choice matters. Spray control matters more.
Why does lacquer punish masking mistakes harder than water-based acrylic?
Lacquer atomizes finer, stays active at the edge longer, and bites harder into what is underneath. That is exactly why it gives beautiful control when used properly. It is also why sloppy masking technique gets punished more brutally.
Water-based acrylic can appear more forgiving, but that softer behaviour often hides bad habits rather than solving them.
Does a sharp mask edge automatically mean a good result?
No. A crisp edge can still sit on a bloated paint ridge and look like a sprayed sticker. A good painted marking needs both edge discipline and restrained film thickness.
A crisp curb is still a curb.
Section 2
Tamiya Tape vs ORAMASK 810
Not all masks behave the same way, and they do not fail the same way either.
When should I choose Tamiya tape instead of ORAMASK 810?
Choose Tamiya tape when the surface is broken up by rivets, welds, raised detail, shallow curvature, or any topography that punishes rigid masking. It is thinner, more forgiving, and more willing to conform cleanly over awkward surfaces.
It is the safer choice when the job is less about perfect geometry and more about controlled contact with the surface.
When is ORAMASK 810 the better choice?
Use ORAMASK 810 when you want precise shapes, repeatable marking geometry, and clean layout control on surfaces that suit vinyl. It is excellent for professionally cut masks and planned marking work where the surface and spray technique are both under control.
It rewards precision. It does not reward carelessness.
Why is Tamiya tape more forgiving?
Because it is thin, conformable, and slightly more tolerant of minor surface irregularities. It is not a magic fix, but it gives the modeller more margin before technique failure becomes visible.
Which mask behaves better over rivets, weld seams, and compound curves?
Tamiya tape. ORAMASK 810 can do excellent work, but it is less forgiving when the surface asks the film to bridge complex detail. Over difficult topography, Tamiya tape is generally the safer tool.
Which material is safer with lacquer?
The safer answer is not the material alone, but the total process. Tamiya tape generally gives more forgiveness. ORAMASK 810 works well with lacquer when the surface is appropriate and the spray is disciplined.
Once airflow gets aggressive, lacquer will expose weak edge contact quickly.
Section 3
Airflow, Spray Direction, and the MAC Valve
Most masking failures are decided here, not at the cutting mat.
What does a MAC Valve change during masking?
It changes delivered airflow right at the airbrush. That matters because masking success depends heavily on how much air energy is actually striking the edge. The MAC Valve lets the modeller trim that energy at the point of use instead of relying on crude regulator-only control.
How does a MAC Valve stop paint being forced under a mask edge?
It reduces the destructive airflow that can pry at the edge and carry wet paint underneath. That matters most during the first trigger hit and during close work. With a MAC Valve, the edge can be sealed with a light, dry mist instead of being blasted with a wet pass that tries to open the mask line.
That is why a MAC Valve is such a wonder tool for masks. It helps prevent underflow by starving the edge of destructive force.
Why is PSI alone crude control?
Because the regulator gives a broad system setting, while the actual behaviour at the brush is still affected by distance, trigger pull, cap geometry, needle size, paint mix, and operator input. The MAC Valve gives immediate control over what the edge actually feels.
Should I spray into the edge or away from it first?
Spray away from the edge first. That initial light pass helps seal the line and reduces the chance of driving wet paint under it. Once the edge is behaving, you can build coverage more safely.
What is a dry sealing mist?
It is a very light initial application intended to start locking down the edge without flooding it. The point is not immediate opacity. The point is edge control. Once that first layer behaves, the rest of the marking gets much safer.
How wet is too wet for a masked marking?
If the paint is pooling, forming a glossy wet ridge, or visibly loading the edge in one pass, it is too wet. Masked markings should be built with restraint. Chase film control first and opacity second.
Bench Standard
PSI is crude control. Airflow is decisive. Lacquer exposes every mistake. Tamiya tape forgives more. ORAMASK 810 rewards precision. Painted markings succeed when film build stays low and edge control stays disciplined.
Section 4
Paint Film Build and Marking Thickness
A crisp edge alone is not enough. If the paint stack is too high, the finish still fails.
Why can airbrushed markings fail the same way thick decals do?
Because both can create a visible height difference over the surrounding finish. The cause is different, but the visual penalty can be the same. Once the marking sits too high, it stops reading as part of the painted surface.
How do I keep a sprayed marking from building a raised ridge?
Use lighter passes, stop chasing instant opacity, and avoid flooding the edge line. The marking should be built gradually. When in doubt, stop earlier rather than later.
Should I chase opacity or build it gradually?
Build it gradually. Strong opacity gained too quickly often comes with excess film thickness, edge loading, and a finish that looks heavy. Controlled build wins.
How do I know when the paint film is already too thick?
Check the marking under raking light or macro photography. If the edge catches light like a miniature curb, the film is too high. What looks acceptable head-on often looks terrible from the side.
How do I use masking tape as a paint-thickness witness line?
Lay a strip of tape on a test surface, spray your marking colour using your intended method, then remove the tape and inspect the step. The tape edge becomes a brutally honest gauge of how much material you are actually building.
Section 5
Surface Prep, Cure, and Adhesion
If the underlying paint is weak, masking becomes a loyalty test your finish will fail.
How cured should the base coat be before masking?
Cured enough that the surface has real cohesion and adhesion, not just touch dryness. Dry to the finger is not the same thing as ready for masking. If there is any doubt, wait longer.
Why did the mask lift paint on removal?
Because the paint underneath was not cured properly, bonded poorly to the surface, or the mask gripped harder than the finish could resist. Fragile paint systems, rushed drying, and aggressive removal all make this worse.
Should I burnish the whole mask hard?
No. Burnish the working edge properly. Do not treat the entire mask like it needs to be welded to the model. Excess pressure across the whole surface can increase removal risk for no good reason.
Should I de-tack the mask first?
Sometimes, yes, especially over delicate finishes. But de-tacking is not a substitute for cure time or proper surface prep. A weak paint layer can still fail under a mild mask.
Can a clear coat improve masking safety?
It can, if it creates a stronger, better-bonded surface and is itself fully cured. But a bad foundation buried under more layers is still a bad foundation.
Still want the full doctrine?
Read the full companion article for the complete masking framework
The FAQ answers the bench questions. The main article explains the full why behind them.
When it goes wrong, name the failure properly first. Then fix the right problem.
What causes a soft feathered edge?
A poor seal, excessive spray distance, excessive wetness, or a mask that is bridging detail instead of contacting it cleanly. The answer is not more paint. The answer is better edge control.
What causes directional undercut?
Spraying into the edge with too much airflow or too wet a pass. The paint is being driven under the line in the same direction as the air stream. Reduce the energy, lighten the pass, and change your direction.
What causes a ghost edge or stain halo?
Usually solvent action, a wet edge, or stain spreading just beyond the line. This is especially common when lacquer is pushed too hard at the boundary. Prevention is far easier than correction.
What causes paint lift?
Uncured paint, poor substrate prep, aggressive adhesive behaviour, or rough mask removal. Paint lift is usually a foundation failure that only becomes visible during mask removal.
What do I do after edge fuzz, undercut, ridge buildup, or paint lift?
Do not panic and immediately drown the area in more paint. First identify the failure correctly. Edge fuzz may need re-masking and a cleaner pass. Ridge buildup may need controlled levelling and re-spraying. Paint lift may require local repair and a rethink of cure time and surface prep before trying again.
The first repair step is diagnosis, not more paint.
Section 7
Painted Markings vs Decals
This is where the FAQ should stop being polite and start being clear.
Why do painted markings usually look more authentic than decals?
Because they can sit closer to the actual painted-surface logic of the real vehicle. When done properly, the marking behaves like paint on the object, not a printed film laid over it.
Can decals ever truly disappear into the finish?
They can be improved dramatically, but they still begin life as a separate film. That is the core limitation. A great decal job can look excellent. A low-build painted marking can look more integral.
What can be corrected with masks that decals do not recover from gracefully?
Masks can be repositioned before spraying, adjusted during layout, and reused with care in some situations. A misplaced waterslide decal is usually already on the clock the moment it touches down.
Why do low-build painted markings weather more convincingly?
Because they do not begin with an extra printed carrier film and they respond more naturally to subsequent finishing work when the paint layer is kept controlled and thin.
Section 8
Photo-Etch Masks
Photo-etch masks are not just another version of tape. They obey different rules.
What are photo-etch masks best used for?
They excel where a repeatable opening is needed and a slight stand-off softness can still look convincing. They are excellent tools when used within their natural limits.
Why must spray direction stay disciplined with PE masks?
Because the mask is not sealed to the surface like tape. If you spray aggressively or at a bad angle, the stand-off works against you. PE masks reward controlled, perpendicular, disciplined application.
What kind of edge should I expect from a PE mask?
Not the same dead-hard seal you expect from well-applied tape. A PE mask can produce an edge that looks convincingly painted, but it requires restraint and judgment.
When does PE softness look convincing, and when does it just look sloppy?
It looks convincing when the softness is controlled, consistent, and visually appropriate to the subject. It looks sloppy when the edge loses discipline, direction, or shape because the spraying got lazy.
When should I choose PE over tape or vinyl?
Choose PE when the stencil format itself suits the subject and when you understand that the edge behaviour will follow PE logic, not tape logic. It is a specialist tool, not a universal replacement.
Closing Doctrine
Good Masks Reward Good Process
Tamiya tape, ORAMASK 810, and photo-etch masks are not miracle products. They are force multipliers for disciplined spraying. When airflow is controlled, film build is restrained, and the edge is treated with respect, the result stops looking like a marking applied to the model and starts looking like part of the model itself.
Airbrush airflow control without the myths, forum folklore, or “just spray at low PSI” nonsense.
This page supports the full MAC Valve Bench Standard article. The Bench Standard lays out the doctrine. This FAQ handles the practical questions modellers actually ask at the bench: setup order, thinning, overspray, spidering, masks, close-in spraying, nozzle choice, and why a MAC Valve matters in the first place.
Bench Standard position
A MAC Valve is not hype, not a toy, and not a substitute for skill. It is a local airflow-metering device at the airbrush. In disciplined hands it tightens the spray footprint, reduces overspray, improves edge behaviour, and gives the modeller far more control than regulator-only spraying.
Core questions
What does a MAC Valve actually do?
A MAC Valve meters delivered airflow at the airbrush itself. That changes atomization behaviour, spray width, paint wetness on the surface, overspray, and edge control in real time. It is meaningful airflow control at the point of use, not a decorative extra.
Is a MAC Valve just another way of lowering PSI?
No. The regulator sets upstream system pressure. The MAC Valve meters air delivery at the brush after that point. Those functions are related, but they are not interchangeable. That distinction is why a MAC Valve changes how the brush behaves during the pass rather than merely changing a number at the compressor.
Does a MAC Valve replace the compressor regulator?
No. You still need a stable regulator setting upstream. The correct arrangement is a tanked compressor, a stable working pressure, and then fine local airflow trimming at the brush with the MAC Valve.
Why does a tanked compressor matter so much?
Because the tank provides a stable reserve of air. The regulator sets consistent working pressure. The MAC Valve then meters that stable air at the airbrush. Without a tank, fine local control becomes less meaningful because the supply itself is already less stable.
Does a MAC Valve make hard edges automatically?
No. It helps tighten the spray cone and reduce overspray, but hard-edge quality still depends on paint reduction, distance, nozzle size, trigger discipline, hand speed, and how wet the paint is landing. A MAC Valve gives more control. It does not replace technique.
Setup and use
What is the correct order for setting up a MAC Valve?
The proper sequence is not random. Set a stable regulator pressure at the compressor first. Reduce the paint correctly for the job. Choose the appropriate needle and nozzle. Start spraying with the MAC Valve more open than you think you need. Then close it incrementally while test spraying until the footprint tightens and the paint lands cleanly.
Should I start with the MAC Valve open or closed?
Start more open than you think you need, then reduce airflow gradually. Starting too closed makes diagnosis harder because sputter, surging, or poor atomization can appear before you know where the stable range actually is.
Is there a universal MAC Valve setting?
No. There is no magic setting. The correct range changes with paint viscosity, thinner system, needle size, nozzle geometry, spray distance, temperature, humidity, and the exact task being done. Anyone selling a universal setting is selling fiction.
Does needle and nozzle size change how a MAC Valve behaves?
Absolutely. Needle and nozzle size change the working character of the brush. The same MAC setting will not behave the same way across different nozzle sizes. That is one reason detail work is always a system, not a single control.
How close should I spray when using a MAC Valve?
Close enough that the reduced spray footprint matters, but not so close that wet paint piles up faster than you can control it. The MAC Valve shines in close-in work, but only when trigger pull and movement stay disciplined. Too close, too wet, and too slow still fail.
Paint reduction and atomization
Why does paint reduction matter so much with a MAC Valve?
Because the MAC Valve only becomes truly useful when the paint is reduced properly. Thick paint resists clean atomization. Over-thin paint without proper air discipline floods, spiders, or breaks apart. The valve lets you tune airflow to the paint. It cannot rescue bad paint preparation.
Does a MAC Valve work best with lacquer?
It works across paint types, but lacquer makes its value easier to exploit because lacquer tolerates higher reduction and still behaves well as a paint film. Water-based systems can benefit too, but they tend to become less forgiving when pushed too far.
Why is a MAC Valve so useful with translucent coats?
Because translucent work is about controlled film-building, not blunt coverage. The MAC Valve helps keep the work tight, prevents flooding, and lets you creep up on opacity in disciplined passes instead of dumping paint onto the surface.
What does the MAC Valve change at the nozzle?
It changes delivered airflow, which changes atomization energy, spray spread, paint wetness, and how much the paint wants to move beyond the intended target area. More air broadens and energizes the spray. Less air tightens the working envelope, but only until you cross into unstable atomization.
Failure modes and diagnostics
Will a MAC Valve fix spidering?
Not by itself. Spidering usually comes from too much wet paint, too much localized force, too much trigger pull, poor reduction, or sloppy paint placement. A MAC Valve can help reduce delivered air and tighten the work zone, but it is only part of the solution.
What happens if the MAC Valve is closed too far?
Go too low and the brush can sputter, surge, flood, or simply stop atomizing cleanly. The goal is not “as little air as possible.” The goal is enough air for clean atomization with the smallest workable footprint.
Why is the airbrush surging or sputtering with MAC control?
Usually because airflow is too restricted, the paint is poorly reduced, the nozzle is partially clogged, or the air supply is unstable. In plain terms, the airbrush is no longer atomizing cleanly.
Why am I getting dry spray or dusty edges?
Usually because there is too much air, too much distance, or the paint is drying before it lands. Trimming delivered air with the MAC Valve can help, but only if distance and reduction are also under control.
Why am I getting pooling or flooding at close range?
Because too much paint is being delivered too slowly over too small an area. A MAC Valve helps only when paired with restraint. It cannot compensate for excessive trigger pull or the impatience of trying to build opacity in one hit.
What problems will a MAC Valve not fix?
It will not compensate for badly thinned paint, poor trigger control, spraying too far from the surface, moving too slowly, unstable compressor output, poor brush tolerances, or a damaged needle, nozzle, or cap. It magnifies both good practice and bad practice.
Masks, tape edges, and underflow
Why is a MAC Valve a wonder tool when airbrushing masks?
Because masks fail when too much air and too much wet paint are driven laterally into the mask edge. That is how underflow starts. A MAC Valve reduces delivered air at the brush, tightens the spray cone, lowers the force pushing paint sideways, and helps the paint land where you intend instead of being rammed under the tape or vinyl edge. When spraying masks, that control is not a luxury. It is the difference between a painted marking and a cleanup job.
Can a MAC Valve eliminate paint creep under masking tape by itself?
No. It helps massively, but it does not replace proper masking. The edge still needs to be seated correctly. The mask still needs to be burnished where appropriate. Paint still needs to be applied in light passes. Flooding a mask edge will still produce trouble no matter what the valve is doing.
How should I spray a mask when using a MAC Valve?
Use a stable regulator setting, a properly reduced paint mix, and trimmed airflow at the brush. Approach with light controlled passes rather than a wet blast. Keep the spray footprint tight. Avoid hosing paint directly into the edge. The goal is to build the marking with discipline, not to force it into opacity in one pass.
Does MAC control matter more with tape masks or vinyl masks?
It matters with both, because both can suffer from paint being forced under the edge. The exact failure character may differ with the material, but the principle does not. When airflow is excessive and the pass is too wet, the mask edge is being challenged harder than it needs to be.
Where it excels
What kind of work benefits most from a MAC Valve?
Fine camouflage, close-in post-shading, value work, translucent colour building, tight metallic work, precision highlights, recess work, raised detail, and spraying around masks. The tighter the margin for error, the more useful local airflow control becomes.
Is a MAC Valve useful for metallic running surfaces and tight detail work?
Very. Metallic details, wear bands, wheel running surfaces, and small highlights benefit from a tighter spray footprint and lower delivered air. That keeps the metallic where it belongs instead of fogging surrounding detail.
Tool choice and skill level
Built-in or inline MAC Valve: which is better?
Built-in valves are compact and convenient. Inline valves often offer more deliberate feel, more usable travel, and finer adjustment. The better choice depends on the design, but for advanced users inline systems often make stronger engineering sense because they turn airflow control into a more tactile part of the tool.
Why do airbrush tolerances matter so much with MAC use?
Because the MAC Valve magnifies what the airbrush already is. A well-machined brush with a true nozzle and stable trigger mechanics responds predictably. A vague, inconsistent, or worn brush responds vaguely and inconsistently. The valve cannot rescue poor tolerances. It only exposes them more clearly.
Do beginners need a MAC Valve?
Not necessarily. A beginner gains more from learning correct thinning, trigger control, hand speed, and distance first. A MAC Valve becomes truly valuable once the modeller can already recognize what a clean line, a wet pass, and a tightening spray cone feel like.
Practice and skill building
What is the best way to learn MAC Valve control?
Practice short, repeatable drills. Spray parallel hairlines, dots without flooding, tight passes, soft transitions, and translucent bands on scrap or test cards. Learn where the brush tightens, where it starts to fail, and what the trigger feels like at that edge. The skill is tactile. It has to be trained in the hand.
What should I actually be trying to feel when practicing?
You are trying to feel the point where the spray footprint tightens and becomes precise without crossing into unstable atomization. That threshold is the useful zone. That is where real MAC control lives.
Related reading
Read the full Bench Standard article
This FAQ page answers the recurring bench questions. The full MAC Valve article explains the airflow logic, atomization behaviour, failure modes, and practice framework in complete form.
A MAC Valve does not make a modeller skilled. It does, however, give skilled hands a level of control that regulator-only spraying cannot match. That matters everywhere fine airbrushing matters, and it matters even more when masks are involved and there is no room for underflow, fogging, or careless paint placement.
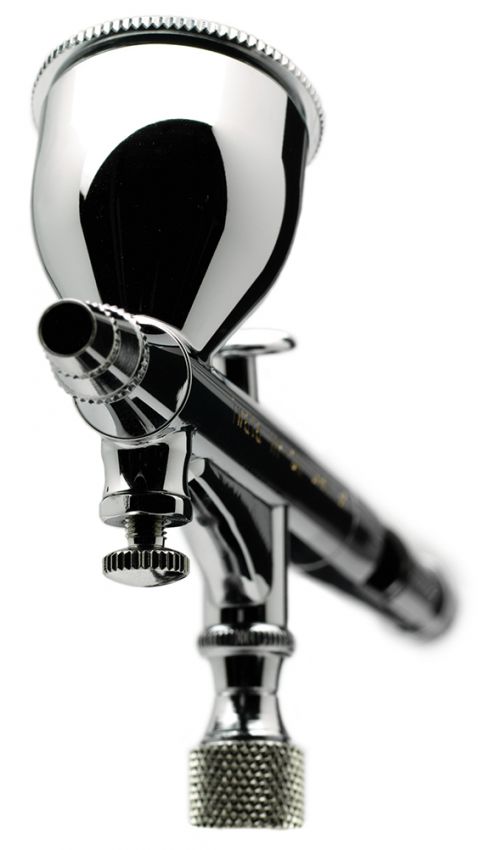
A MAC Valve is not a gimmick, and it is not a substitute for learning how to airbrush properly. It is a precision airflow-control device mounted at the airbrush that allows the modeller to regulate the amount of air reaching the nozzle in real time. Used correctly, it gives tighter control over atomization, spray pattern, overspray, wetness, and edge behaviour than regulator pressure alone ever can.
That matters because fine airbrushing is not simply about low PSI. It is about controlling what the paint is doing at the point of discharge. A compressor regulator sets system pressure upstream. A MAC Valve lets you control delivered airflow at the brush itself. That distinction is everything.
For the serious modeller, that means sharper camouflage boundaries, cleaner mottling, tighter post-shading, more disciplined translucent work, less overspray, and better paint placement exactly where it is needed.
Bench Standard
A MAC Valve meters delivered airflow at the airbrush. It does not replace the regulator, and it does not replace skill.
TechNote
The regulator sets upstream system pressure. The MAC Valve trims air delivery at the brush itself, changing atomization behaviour in real time.
Failure Mode
A MAC Valve magnifies both good practice and bad practice. Poor paint reduction, poor trigger control, and poor distance discipline still fail.
What a MAC Valve actually does
A MAC Valve does not replace your regulator. It does not magically create skill. What it does is give you local control over air volume and delivery right at the airbrush, where that control matters most.
In practice, opening the valve allows more air through the brush. Closing it restricts the airflow. That change affects how aggressively the paint atomizes, how broad the spray cone becomes, how wet the paint lands, and how much the paint wants to spread beyond the intended target area.
The result is immediate control over:
spray width
edge sharpness
overspray behaviour
paint wetness on the surface
trigger response in the fine-detail zone
This is why a MAC Valve matters. It lets the modeller trim the brush to the task instead of fighting a one-setting compromise.
Airflow control is not the same as pressure control
This is where many explanations go wrong.
A compressor regulator sets the pressure available in the system. A MAC Valve alters the airflow reaching the airbrush after that point. In other words, the regulator establishes the reservoir of available energy, while the MAC Valve meters how much of that energy is actually being used at the brush.
That is why a tanked compressor matters. The tank provides a stable reserve. The regulator sets a consistent working pressure. The MAC Valve then becomes a fine metering device, allowing the modeller to adjust the brush in real time without constantly walking back to the compressor or disturbing the upstream setting.
This is also why experienced users often run a stable system setting around 1.5 bar / 22 psi and then work the MAC Valve by feel. The goal is not to chase numbers. The goal is to trim airflow at the airbrush to suit paint reduction, needle size, spray distance, and the exact character of the line being sprayed.
Doctrine Note
A MAC Valve is not a second regulator in the casual sense modellers often describe it. It is a local metering device that changes the behaviour of the airbrush at the point of use.
The physics behind it
The MAC Valve makes sense when viewed through basic fluid dynamics.
At the nozzle, air velocity, pressure differential, and paint draw interact through Bernoulli’s principle and the Venturi effect. Faster-moving air lowers pressure at the pickup point and helps draw and atomize the paint. That atomized paint then exits as a spray pattern whose behaviour depends on airflow volume, paint viscosity, nozzle geometry, and trigger position.
The practical takeaway is simple:
More delivered air generally increases atomization energy, broadens the effective spray pattern, and can increase overspray or dry spray if the paint is too thin, the distance is too great, or the hand is too slow.
Less delivered air reduces the violence of atomization, tightens the working envelope, and can give extraordinary control for close-in detail work, but only if the paint is reduced correctly and the trigger hand is disciplined. Go too low and the brush can sputter, surge, or flood because the paint is no longer being carried and atomized cleanly.
That is why the MAC Valve is not a beginner convenience. It is an advanced control surface.
Why skilled users value it
A good MAC Valve changes the behaviour of the airbrush in the most important zone of trigger travel: the first small portion where detail lives.
That is where broad, clumsy airbrush handling ends and real precision begins.
With a MAC Valve, the modeller can:
tighten the spray footprint without touching the compressor
reduce overspray while working very close to the surface
prevent spidering when using highly reduced paint
keep metallics, filters, and translucent coats under tighter control
tune the airbrush to changing conditions during a pass
The benefit is not theoretical. It is tactile. You feel it in the trigger. You see it in the edge. You recognize it in how much less correction work is needed afterward.
What it is not
A MAC Valve is not a cheat code.
It will not compensate for:
badly thinned paint
poor trigger control
spraying too far from the surface
moving too slowly
unstable compressor output
poor airbrush tolerances
a damaged needle, nozzle, or cap
A MAC Valve magnifies both good practice and bad practice. In a disciplined setup, it is transformative. In a sloppy setup, it merely gives the user another variable to mishandle.
Built-in vs inline MAC Valve
There are two common arrangements: a built-in MAC valve on the airbrush itself, and an inline valve fitted at the airbrush air stem.
Built-in MAC Valve
A built-in MAC Valve keeps the package compact and convenient. It is always there, always ready, and can be extremely effective in capable hands. For users who know their brush well, it offers fast adjustments with minimal disruption.
Its advantage is simplicity.
Its limitation is that not all built-in valves offer the same range, feel, or refinement. Some are useful. Some are merely serviceable.
Inline MAC Valve
An inline MAC Valve mounted at the brush air stem is often the better engineering solution for users who want more adjustment range and finer control. It can offer a more deliberate feel, more usable travel, and, depending on the model, better repeatability.
Its advantage is precision and modularity.
Its limitation is that it adds complexity and puts another component into the chain, which means the rest of the setup must be equally sound.
For advanced users, inline systems often make more sense because they turn airflow control into a more tactile and more adjustable part of the tool rather than a convenience feature.
Why tolerances matter
The MAC Valve does not operate in isolation. It magnifies the mechanical quality of the airbrush it is attached to.
A brush with good tolerances, a true nozzle, a consistent needle, and stable trigger mechanics responds predictably to MAC adjustment. A mediocre brush does not.
This is why higher-end airbrushes tend to benefit more from MAC use. When the machining is good, the nozzle geometry is right, and the trigger linkage is clean, fine airflow adjustments become meaningful. When tolerances are loose, the MAC Valve cannot rescue the system from inconsistency.
The price difference is often in the tolerances.
Diagnostic Indicator
If MAC adjustment feels vague, erratic, or unrepeatable, the problem may not be the valve. It may be the airbrush itself.
Paint reduction and the MAC Valve
The MAC Valve only becomes truly useful when the paint is reduced properly.
If the paint is too thick, the valve cannot give finesse because the paint resists clean atomization. If the paint is too thin without proper air discipline, it will flood, spider, or break apart unpredictably. The MAC Valve sits in the middle of that equation, allowing the user to tune the airflow to the paint rather than forcing the paint to behave under a fixed air setting.
This is especially important when using highly reduced lacquer for translucent work. With correct reduction and local airflow control, the modeller can build colour slowly, preserve surface detail, and creep up on opacity rather than dumping paint onto the surface.
That is where the MAC Valve earns its keep.
Where it excels
A MAC Valve is most useful in the following situations:
Fine camouflage
German mottling, soft-edged disruptive patterns, and narrow spray lanes all benefit because the air can be trimmed to reduce spread and overspray.
Post-shading and value work
It allows the user to work close and controlled, nudging value without fogging the surrounding area.
Tight metallic work
Small metallic details, wheel running surfaces, wear bands, and precision highlights benefit from lower delivered air and careful trigger handling.
Translucent coats
When colour is being built as a film rather than as coverage, MAC control helps prevent flooding and lets the modeller creep up on the result.
Problem surfaces
Complex geometry, recesses, raised detail, and close-in work around masks all become easier when the spray footprint is under control.
How to use it properly
The proper sequence is not random.
First, establish a stable regulator setting at the compressor using a tanked system.
Second, reduce the paint correctly for the type of work being done.
Third, choose the appropriate needle/nozzle size.
Fourth, begin spraying with the MAC Valve more open than you think you need.
Then, while test spraying, reduce the airflow incrementally until the spray footprint tightens and the paint lands the way you want.
At that point, the work becomes tactile. The modeller balances:
trigger pull
paint reduction
MAC position
spray distance
hand speed
That balance is the skill.
There is no single universal setting because the brush behaves differently with different paints, nozzle sizes, temperatures, humidity levels, and working distances. Anyone promising a magic MAC setting is selling fiction.
Failure Mode
Failure modes
Spidering
Usually caused by too much wet paint landing too fast for the surface or too much localized force for the reduction being used. The answer is not always less pressure. Often it is better paint discipline, less trigger pull, closer control of airflow at the brush, and faster movement.
Surging or sputtering
Often caused by airflow being closed down too far, poor paint reduction, partial clogging, or unstable delivery. The airbrush is no longer atomizing cleanly.
Dry spray
Usually caused by too much air, too much distance, or paint drying before it lands. The MAC Valve can help by trimming delivered air and keeping the work zone tighter.
Pooling
Usually caused by excessive trigger pull, slow movement, or trying to build opacity too quickly. The MAC Valve helps only when paired with restraint.
Doctrine Note
Practice is non-negotiable
The MAC Valve is a feel-based tool.
That matters because the real gains happen in the hand, not on paper. You learn where the brush starts to tighten. You learn how far you can reduce airflow before atomization becomes unstable. You learn what the trigger feels like when you are right on the edge of a clean, controlled line.
That cannot be learned by reading about it alone.
The fastest way to build MAC proficiency is through short, focused drills:
spray parallel hairlines at close range
practice dots without flooding
feather a dark line into a soft transition
build translucent passes without tipping into coverage
deliberately explore the point where the brush begins to sputter, then back off
That is how muscle memory is built. That is how control becomes instinctive.
The real value of a MAC Valve
The real value of a MAC Valve is not that it gives you more adjustment.
It gives you meaningful adjustment where it matters most: at the airbrush, during the pass, while the paint is in motion.
That turns the airbrush from a blunt spray tool into a controllable instrument.
For advanced users, that difference is enormous. It is the difference between hoping a line lands correctly and placing it deliberately. It is the difference between managing overspray afterward and preventing it in the first place. It is the difference between broad approximation and disciplined paint placement.
A MAC Valve does not make a modeller skilled.
But in skilled hands, it unlocks a level of control that regulator-only spraying simply cannot match.
Kawartha Scale Modellers | ModelWorX Bench Standard
Precision in Practice: Why Drop-Counting Changes Everything
Professional results do not come from luck, vibes, or eyeballing the cup. They come from control. Drop-counting transforms paint mixing from a casual habit into a repeatable bench discipline that improves consistency, troubleshooting, and finish quality.
Bench Standard: A paint mix that is not measured is a paint mix you cannot truly repeat.
Doctrine Note
Precision
Known drop ratios produce known viscosity. That gives you tighter control over atomization, flow, edge definition, and surface behaviour.
TechNote
Repeatability
A good mix should not be a one-time miracle. Measured ratios let you recreate the same working behaviour days, weeks, or months later.
Diagnostic Indicator
Predictability
Once a ratio is recorded, it becomes useful bench data. You are no longer hoping for a result. You are engineering one.
Why drop-counting matters at the bench
Drop-counting replaces approximation with a measurable proportion. That matters because small changes in viscosity can change everything: spray pattern, atomization quality, coverage, edge softness, drying behaviour, and the final optical character of the finish. When ratios are controlled, the technique has a stable platform to work from.
This is not bench fussiness. It is a process discipline. It strips out avoidable variables, so the modeller can make meaningful adjustments instead of random ones.
What written ratios give you
Baseline control: Every future adjustment starts from a known working point.
Faster troubleshooting: When something goes wrong, you can identify what changed.
Better repeatability: Strong results stop being accidental and become reproducible.
Long-term bench knowledge: Ratios build a usable paint behaviour library over time.
Bench Note
A modeller who records paint ratios is not merely mixing paint. He is building a reliable operating system for future work.
Drop-count ratio quick reference
Thinner %
Thinner
Paint
Ratio
5%
1
19
1:19
10%
1
9
1:9
15%
3
17
3:17
25%
1
3
1:3
30%
3
7
3:7
40%
2
3
2:3
50%
1
1
1:1
60%
3
2
3:2
70%
7
3
7:3
80%
4
1
4:1
90%
9
1
9:1
These are the minimum whole-number drop ratios required to reach the target thinner percentage in the final mix.
Failure Mode
Do not confuse consistency with accuracy
A common working assumption is that roughly 20 drops equals about 1 mL, but the actual drop size varies with the bottle, dropper, and fluid. The exact volume is less important than keeping the drop size consistent within your own workflow.
Test first. Record everything.
Ratios are the starting line, not the finish line. Paint chemistry, ambient temperature, humidity, nozzle size, air volume, and required finish all affect the final behaviour. Test on scrap first. Record the ratio, how it sprayed, how it covered, and how it dried. Those notes become one of the most valuable tools on the bench.
Diagnostic Indicator
If the spray pattern changes, and you do not know what changed in the mix, the problem is not only paint behaviour. It is missing process control.
Bench Standard
Drop-counting is not a minor bench habit. It is a foundational process discipline for predictable, repeatable paint control.
Conclusion
Drop-counting brings discipline to the bench. It replaces approximation with control, gives the modeller usable data, and turns strong paint performance into something that can be repeated on demand. In a craft where tiny variables create major visual consequences, that is not a small advantage. It is the advantage.
Scale modelling has an identity problem. For all the skill it demands, it is still too often trapped beneath a lazy public caricature: grown men playing with toys. It is cheap, stale, and inaccurate, yet persistent enough that some modellers begin to carry it themselves. You can see it in the hesitation, the soft apology, the self-consciousness that appears the moment the hobby leaves the safety of its own tribe.
Inside a model show, the hobby is understood. The room is fluent. People recognize the labour, the finish, the research, the restraint, the technical judgement. Outside that room, the mood changes. At a library display, community fair, heritage event, or small-town exhibition, many modellers suddenly feel exposed. The audience is no longer pre-qualified. It includes people who may glance at the table and see only small models rather than concentrated craftsmanship.
KSM Call-Out
The problem is not the hobby. The problem is how poorly the hobby is understood outside its own walls.
Scale modelling has never lacked dignity. What it has lacked, too often, is confident interpretation in public space.
Visual reality is already accepted everywhere else
There is a contradiction hiding in plain sight. The public already accepts miniature reality everywhere else. In the movies, viewers accept smoke, dust, sparks, rain, debris, shallow depth of field, forced perspective, and particle effects without hesitation. Those visual cues are absorbed instantly as part of the reality of the scene.
Scale modelling operates in much the same territory. A strong model is not merely a small object. It is a controlled visual argument. It uses proportion, colour, texture, weathering, composition, and context to persuade the eye. Add macro photography, and the illusion deepens further. The camera no longer sees a tabletop piece. It begins to see a world. Macro creates a fictitious reality, but not a false one. It reveals how convincingly the modeller has compressed reality into scale form.
Why this matters
The same public that accepts miniature illusion in film as visual truth often fails to recognize that same visual intelligence when it sits three feet in front of them on a hobby table.
The real issue
That is not a failure of the work. It is a failure of recognition, and at times a failure of confidence within the hobby itself.
Why KSM’s educational strategy matters
That is why professional promotion of the hobby matters. Not only through hands-on public displays, club tables, and face-to-face conversation, important though those remain, but through structured education that teaches people what they are looking at.
A club like KSM does not elevate the hobby merely by putting models on display. It elevates the hobby by framing the work properly through articles, how-to features, technique posts, member builds, and skill development on the KSM website. When the public sees the process, the research, the methods, and the standards behind the finished work, the hobby gains legitimacy.
KSM Website Call-Out
Technique articles that explain the craft behind the finish
Member build features that show depth, research, and process
Workshop posts that foster real skill development
Event coverage that positions KSM as a serious creative community
Educational content that closes the gap between public assumptions and modelling reality
The shame never belonged to the hobby. It belonged to the false story wrapped around it. Scale modelling has been hiding in plain sight for years, using the same visual language of illusion, atmosphere, and constructed reality that the public already accepts in cinema, photography, and visual effects. People have already been trained to believe in miniature worlds. They simply have not yet learned to recognize them on a hobby table.
That is not a reason to shrink. It is a reason to stand straighter, explain the work better, and let the hobby speak in its full voice.
Discover KSM
Kawartha Scale Modellers is more than a meeting table. It is a growing educational community built around craftsmanship, encouragement, visual storytelling, and real skill development.