Step-by-Step Strategies for Flawless Isolation, Advanced Lighting, and Precise Post-Processing to Highlight Your Build
In the world of scale model photography, capturing every intricate detail while keeping your subject free from distractions is essential. Whether you’re a hobbyist or a professional, learning how to isolate your model against an impeccably black backdrop can transform your images into works of art. This comprehensive guide walks you through the entire process—from meticulous pre-shoot planning and advanced lighting techniques to precise camera control and expert post-processing. Unlock the secrets to creating images that make your scale models truly stand out against the void and leave an indelible impression on your audience.
Below is the extended, detailed, step-by-step blog post on photographing your scale model against an all-black backdrop. In addition to an expanded explanation on every element of the process, a new “What to Take Away” section summarizes key insights and best practices.
Skillset: Advanced
Prerequisite: Proficient in Camera and Lighting Functionality
Mastering Scale Model Photography on an All-Black Backdrop
Capturing the intricate details of a scale model while isolating it against an absolute black background creates images with dramatic impact and professional quality. This guide is designed for enthusiasts and professionals alike, offering granular insights into every stage—from planning and shooting to advanced post-processing techniques. By the end, you’ll not only understand how to achieve the perfect shot but also the core elements that make your setup work.
Introducing: Obsidian Isolation Technique: ShadowCraft Photography
Experimenting with backdrops, lighting, and photography is fun and immensely rewarding. Over the years, I’ve explored numerous photographic approaches, but one style consistently stands out as my favorite—Obsidian Isolation Technique: ShadowCraft Photography. I named it after the obsidian arrowhead that prominently rests on my desk, a symbol of focus and precision.
This unique brand name encapsulates the essence of creating striking, high-detail images by isolating your scale model against an absolute black backdrop. “Obsidian” evokes the deep, reflective darkness of volcanic glass, while “Isolation” emphasizes the focused presentation of your subject, letting every intricate detail shine. This technique is not just about technical proficiency; it is a fusion of artistic vision and meticulous execution, designed to transform your photographic work into visual masterpieces.
1. Pre-Shoot Planning and Equipment Selection
A. Define Your Vision and Goals
- Purpose and Emphasis:
Start by deciding which details you want to highlight—textures, structure, or intricate craftsmanship. This clarity in purpose directs your choice of equipment, lighting, and composition. - Sketch Your Layout:
A preliminary sketch or mood board can be immensely useful. Visualizing the composition will help you decide on lighting angles, camera positions, and how best to frame the model to emphasize its unique features.
B. Essential Equipment List
- Camera:
- A DSLR or mirrorless camera is ideal, with full-frame options offering better low-light performance and dynamic range than a point and shoot camera.
- Cropped APS-C Sensor Cameras: These models are especially advantageous in scale model photography. The inherent crop factor (typically around 1.5x to 1.6x) effectively extends the focal length of your lenses, enabling you to capture intricate details from a closer distance. This benefit mirrors techniques used in cinematic formats—many movies are shot in low-light conditions using the Super 35 movie format, which employs cropped APS-C sensors to maximize depth of field and lens compression. Additionally, the choice of lens becomes critical with APS-C cameras; pairing them with fast, high-quality lenses ensures that you leverage the sensor’s strengths while maintaining sharpness and clarity. Compact and often budget-friendly, these cameras are an excellent choice for photographers seeking portability alongside high-performance imaging.
- Smartphone and Tablet Cameras: Modern smartphones and tablets now feature high-resolution sensors and advanced computational photography, making them viable tools for creative photography. With the right apps and accessories—such as clip-on macro lenses or stabilizing rigs—these devices can produce impressive detail and color accuracy, especially in controlled environments. Leveraging these portable options allows for quick experimentation and on-the-go shooting, which can be particularly useful for capturing creative angles or testing ideas before committing to a full-scale setup.
Low Light Considerations in Scale Model Photography
When discussing “low light” in the context of photography, it typically refers to conditions where ambient light is minimal—often requiring the camera to rely on high ISO settings or longer exposure times. However, when it comes to the Obsidian Isolation Technique for scale models, the scenario is somewhat unique:
- Controlled Lighting Environment:
In this type of photography, you deliberately create low ambient light conditions to ensure that only your subject is illuminated. This controlled environment means you are not necessarily battling natural low light in a real-world setting but are instead harnessing artificial lighting to balance the exposure between your brightly lit subject and the dark backdrop. - Importance of Sensor Performance:
Even though you’re using external lights to illuminate your model, the overall exposure can still be low, especially when you want to preserve that deep, absolute black backdrop. Cameras with robust low-light performance, such as full-frame and quality APS-C models, help you manage this delicate balance without introducing unwanted noise or losing detail. - ISO and Exposure Settings:
While high ISO performance is a significant advantage in true low-light photography, in controlled setups like this, you can keep your ISO low (typically between 100–200) since you’re using studio lights. This mitigates the risks of noise while capturing the fine details of your scale model, ensuring that the dramatic contrast between the subject and the background is maintained. - Applicability to Your Technique:
For the Obsidian Isolation Technique, the goal is to have complete control over the lighting. Both DSLR/mirrorless cameras and APS-C sensors offer the flexibility to adjust settings to suit this controlled low light situation. You can manually set exposure, aperture, and shutter speed to precisely light your subject while ensuring the background remains pitch black. In this context, “low light” is less about capturing a naturally dark scene and more about achieving a specific artistic look with precision.
By understanding what low light means in your setup and how each camera type performs under these conditions, you can make informed decisions about the best tools for your signature style.
2. Creating the Perfect Shooting Environment
A. Constructing an Absolute Black Backdrop
- Material Selection:
- Velvet or Matte Fabric: These materials absorb light rather than reflecting it. Choose a fabric that maintains a uniform tone for both vertical and horizontal surfaces.
- Seamless Integration: Create a “corner” by joining the wall and floor with the same material, ensuring there are no interruptions or reflections that could detract from your subject.
- Backdrop Setup:
- Mounting: Secure the backdrop using stands, clamps, or tape so that it’s wrinkle-free. Ensure that the setup extends far enough to cover any visible background from all angles.
- Underfoot Uniformity: Use a matching black surface (e.g., black acrylic sheet or foam board) beneath the model. This technique creates the illusion that the model is suspended in complete darkness.
B. Controlling Ambient Light
- Designated Space:
Choose a location where you have full control over light—either a dedicated studio or a darkened room. This minimizes unwanted light spill. - Light Blocking Techniques:
- Use black foam boards, flags, or barn doors to shield areas where stray light might otherwise interfere.
- Avoid working near reflective surfaces that can bounce additional light onto your backdrop.
- Environmental Consistency:
Ensure that your shooting space remains consistent—temperature and ambient light levels can vary, so adjust your setup to maintain uniform conditions throughout the session.
3. Advanced Lighting Techniques for Dramatic Isolation
A. Crafting the Ideal Light Setup
- Primary (Key) Light:
- Positioning: Arrange your key light at a 45° angle relative to the subject. This positioning casts deliberate shadows and highlights the model’s contours.
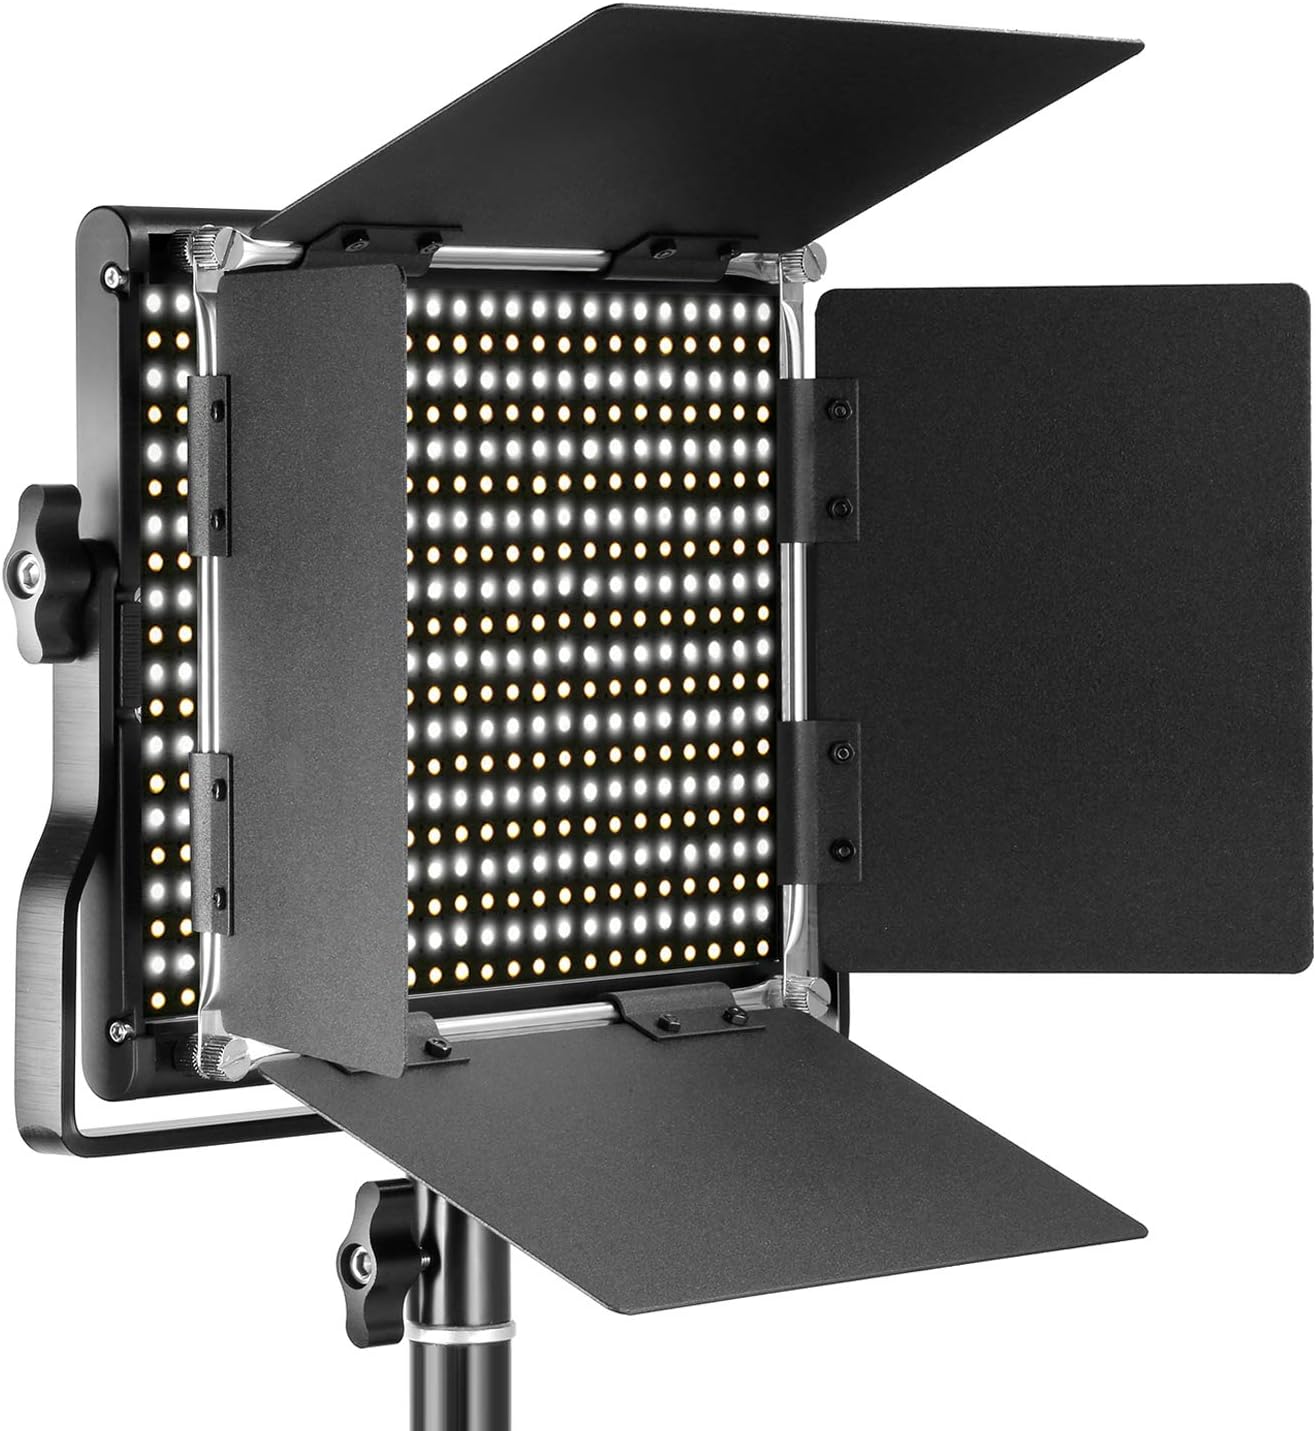
- Light Modifiers: Use a softbox or diffuser on the key light to soften the light. Controlled softness prevents harsh shadows and preserves fine details.
- Secondary (Fill/Accent) Lights:
- Use additional lights sparingly to gently lift shadows. The goal is to maintain detail in the darker areas without compromising the overall dark backdrop.
- Small, adjustable LED panels can work well if you need subtle fill without affecting the backdrop.
- Preventing Light Spill:
- Control Tools: Barn doors, flags, and grids are indispensable for ensuring that light only illuminates the model. Adjust these accessories so that the illumination stops exactly where needed.
- Lighting Ratios: Aim for high contrast between the well-lit model and the deep black background. Use lighting meters to verify that light spill is minimized.
B. Experimenting with Lighting Effects
- Backlighting or Rim Lighting:
A secondary light placed behind the model can create a delicate rim, adding depth and separation. However, it must be balanced carefully to avoid creating unwanted halos that break the uniform darkness. - Color Temperature:
Ensure that all lights maintain a consistent color temperature. Calibrate your white balance to suit your chosen lights (tungsten vs. daylight) to preserve natural color rendering. - Dynamic Ratios:
Experiment with different lighting ratios to find the balance where the model is clearly visible and detailed, but the background remains inky black.
4. The Impact of Light Quality: Hard vs. Diffused Lighting
Understanding the quality of light is pivotal in photography, as it not only illuminates your subject but also establishes the mood and highlights textures. Here’s how different lighting qualities can be used to achieve your desired artistic effect:
A. Hard Light for Drama and Definition
- Characteristics:
Hard light is produced by a small, focused light source (such as an undiffused LED panel or direct flash). It creates sharp, well-defined shadows and pronounced highlights, which add a sense of drama and intensity to your images. - Effects on Your Model:
- Dramatic Contrast: Hard light accentuates textures and edges, creating high contrast that can bring out the fine details and crisp lines of your scale model.
- Emphasis on Form: The sharply defined shadows create a sculptural effect, enhancing the three-dimensional form of the model. This is ideal if you want to emphasize intricate details or unique textures.
- Risk and Reward: While hard light can produce striking images, it also risks creating overly harsh shadows or areas where details are lost due to extreme contrast. It works best when you deliberately want to evoke a mood of tension or dynamic energy.
B. Diffused Lighting for Soft, Even Illumination
- Characteristics:
Diffused lighting is achieved by using softboxes, diffusers, or bouncing light off a large surface. This results in a broad, even light that minimizes harsh shadows and softens the overall look of the image. - Effects on Your Model:
- Soft Shadows: Diffused light creates gentle, gradual transitions between illuminated areas and shadows. This produces a more natural and approachable look with less visual strain.
- Uniform Exposure: With fewer harsh contrasts, diffused lighting is excellent for showcasing the model in a balanced manner, where even subtle details are visible without being overshadowed by dramatic shadows.
- Ideal for Detail Preservation: This lighting type is particularly useful when you want to display color accuracy and a detailed representation without the distraction of deep, dark shadows.
C. Choosing the Right Lighting Quality
- Artistic Intent:
Your choice between hard and diffused lighting should align with your creative vision. If you’re aiming for a bold, high-contrast aesthetic that emphasizes the model’s structure, hard light might be the way to go. Conversely, if your goal is to achieve a natural, soft render that highlights all aspects of the model evenly, diffused lighting is your best bet. - Practical Experimentation:
Don’t hesitate to mix both lighting types—using hard light to accentuate certain features while maintaining overall balance with diffused fill lights can offer a dynamic, layered effect.
5. Mastering Camera Settings and Composition
A. Fine-Tuning Camera Settings
- Manual Mode:
Rely on manual mode to gain full control over your exposure, focus, and depth of field. - Aperture:
- For maximum detail, use a narrow aperture (around f/8 to f/16) to ensure deep focus.
- Alternatively, a wider aperture might be used intentionally for artistic, shallow depth-of-field effects.
- ISO:
Keep the ISO low (100–200) to avoid introducing noise, which is especially important in low-light conditions. - Shutter Speed:
Use slower shutter speeds when on a tripod, but be cautious of any camera shake. A remote shutter or self-timer is crucial here. - White Balance:
Calibrate your white balance using a gray card for accuracy, based on your lighting conditions.
B. Composition and Focusing Techniques
- Manual Focusing:
Use manual focus and focus peaking or magnification features for precision, particularly in macro photography. - Focus Stacking:
For extremely detailed shots, capture multiple images at varying focus points and merge them in post-processing to attain complete depth of field. - Framing and Cropping:
- Consider both traditional compositions (rule of thirds) and centered framing, as the clean black backdrop can make symmetry very compelling.
- Avoid too much empty space unless it’s part of your artistic intent. Crop tightly around the model to draw focus solely on its details.
- Histogram Utilization:
Verify your exposure using the histogram. Ensure that the shadows are deep and the highlights are well preserved to keep the background pitch black while showcasing the model’s features.
6. Executing the Shoot: Test Shots and Adjustments
A. Pre-Shoot Testing
- Initial Test Shots:
Begin with a series of test shots to ensure that your lighting setup, camera settings, and composition are working together. Look for any light spill, unwanted reflections, or focus issues. - Adjustments Based on Tests:
- If stray light appears on the backdrop, adjust your flags or reposition your lights.
- Tweak exposure settings, lighting intensities, and camera focus until you achieve a perfectly balanced image.
- Re-assess the histogram with each modification to confirm that your blacks remain intact while the model is well-lit.
B. Environment and Setup Consistency
- Maintain Stability:
As you continue shooting, be mindful of any changes in the environment that might affect your results. Re-check your equipment setup and ambient conditions periodically. - Iterative Refinement:
Constantly compare test shots to fine-tune every variable—from shutter speed to light positioning—until every element aligns with your visual goals.
7. Post-Processing Techniques for a Polished Final Image
A. Enhancing Contrast and Detail
- Contrast and Clarity:
Use post-processing software (GIMP, Darktable, RawTherapee — Linux: Adobe Lightroom, Photoshop, or similar) to boost the contrast so that the blacks remain deep. Adjust clarity settings to enhance texture without introducing noise. - Exposure Adjustments:
Utilize selective exposure tools to further refine the brightness of the model relative to the backdrop. Layer masks can be valuable in targeting specific areas that require adjustment without altering the overall image.
B. Advanced Editing and Cleanup
- Spot Corrections:
Remove any minor light leaks or inconsistencies on the backdrop using tools like the clone stamp or healing brush. - Noise Reduction:
Apply noise reduction judiciously, especially if you had to use a slower shutter speed during the shoot. - Final Color Adjustments:
Revisit your white balance and saturation settings. Ensure that the colors of your model are rendered naturally while maintaining the stark contrast against the black background.
7.1 Exposure Stacking
Exposure stacking is an advanced post-processing technique designed to overcome limitations in dynamic range when capturing scenes with both very dark and very bright areas. In the context of the Obsidian Isolation Technique, exposure stacking is particularly useful for ensuring that every detail of your scale model is well-exposed:
- How It Works:
By capturing multiple exposures with varying shutter speeds and/or apertures, you can later merge these images to produce a single composite that balances the brightness between the highlight areas and the deep blacks. This process allows for enhanced detail in areas that might otherwise be underexposed, without losing the dramatic contrast that the technique is known for. - Benefits for Scale Model Photography:
With a controlled lighting environment where the subject is deliberately lit against a pitch-black backdrop, exposure stacking helps preserve the subtle gradations on your model’s surfaces. It ensures that shadow details are visible without compromising the absolute darkness of the background. Additionally, it enables you to manage any slight overexposure on reflective surfaces. - Application Tips:
When setting up your shot, bracket your exposures by altering your shutter speed, or adjust the aperture slightly, while keeping a consistent white balance. In post-processing software, use stacking tools or exposure blending functions to combine the images, carefully aligning and masking areas to achieve a seamless final image.
7.2 Photo Stacking
Photo stacking encompasses several techniques where multiple images of the same subject are combined to improve overall image quality. This approach is especially beneficial for maximizing depth of field and reducing noise in macro photography:
- Focus Stacking and Beyond:
While focus stacking—capturing images at varying focus distances and merging them for extended depth-of-field—is well-known, photo stacking can also refer to simply averaging multiple shots of the same scene. By doing so, you reduce random noise and enhance overall clarity, which is crucial when shooting intricate scale models. - Why It Works:
Stacking multiple images helps in situations where capturing every minute detail in a single shot is difficult due to limitations like depth of field or sensor noise. The technique works by leveraging data redundancy across frames to smooth out imperfections, resulting in an image that is both sharp and rich in detail. - Practical Considerations:
Use a stable tripod to ensure that all images align perfectly during capture. In post-processing, dedicated software and plugins—often available in programs like Adobe Photoshop or specialized stacking software—can automate the merging process, giving you a composite image that faithfully represents your model with enhanced detail and reduced noise.
8. Enhancing Clarity and Reducing Glare with Essential Accessories
Leveraging additional equipment can further refine your scale model photography. By incorporating a non-reflective UV filter, lens hoods, and a circular polarizing (CPL) filter, you can mitigate unwanted reflections, manage lens flare, and increase image detail.
A. Non-Reflective UV Filter
- Purpose and Benefits:
- Lens Protection: A non-reflective UV filter acts as a protective barrier against dust, scratches, and environmental damage without sacrificing image quality.
- Minimize Glare: The non-reflective coating reduces unwanted reflections on the filter surface, ensuring that stray light does not degrade the clarity of your image.
- Enhanced Contrast: By minimizing flare and ghosting, a UV filter helps maintain the integrity of dark areas, which is critical when working with an all-black backdrop.
B. Lens Hoods
- Purpose and Benefits:
- Flare Prevention: A lens hood blocks stray light from entering the front element of the lens. This is essential when working with bright light sources or when the lighting setup is complex.
- Improved Contrast: By preventing flare, the lens hood contributes to higher contrast images, ensuring that your model’s details are rendered crisply against the dark background.
- Focus on Subject: Lens hoods also help maintain a clean composition by eliminating unwanted light artifacts, allowing the focus to remain solely on the model.
C. Circular Polarizing (CPL) Filter
- Purpose and Benefits:
- Eliminate Surface Sheen: The CPL filter is highly effective at reducing reflections from shiny surfaces, such as painted areas or glossy model parts. This makes fine textures and details more visible.
- Boost Color Saturation: A polarizing filter can enrich colors and enhance overall contrast, resulting in more vibrant and detailed images.
- Enhance Overall Detail: By reducing glare, the CPL filter ensures that the light interacts more naturally with the surface of the model. This can be particularly beneficial when capturing intricate textures and subtle color gradations.
- Usage Considerations:
- Rotate the CPL filter to achieve the desired effect; the angle of the filter relative to the light source will determine how much glare and reflection are reduced.
- Use in combination with a lens hood for maximum protection against stray light and environmental interference.
9. Creative Exploration and Troubleshooting
A. Pushing Your Creative Boundaries
- Multiple Compositions:
Don’t hesitate to try various angles and lighting setups. Sometimes a slight change in the angle can reveal hidden details or add a new dimension to your model’s appearance. - Macro vs. Full-Frame Approaches:
Alternate between extreme close-ups (to capture micro-level details) and wider shots (to show the complete form of your build). This provides viewers with both intimate details and an overall perspective. - Emphasizing Texture:
Experiment with off-axis lighting to highlight surface details like weathering or intricate paint layers. Creative use of side or backlighting can further accentuate texture and enhance the visual drama.
B. Troubleshooting and Common Challenges
- Light Spill Prevention:
Monitor your modifiers carefully. Even the smallest gap or misaligned barn door could let stray light mar the pure black background. - Ensuring Uniform Background:
If parts of the backdrop appear uneven, adjust the tension and positioning of your materials. Adding an extra layer of matte fabric or foam board often resolves these issues. - Focus and Depth Issues:
For subjects with extreme detail, consider focus stacking. It’s a powerful technique that merges multiple images to ensure every part of your model is sharply in focus.
10. What to Take Away
This section distills the essential lessons and techniques that will benefit you in every aspect of scale model photography using an all-black backdrop.
- Vision and Preparation:
Understand your artistic goals and plan accordingly. A clear vision, backed by a well-thought-out sketch and proper equipment selection, is the foundation of every successful shoot. - Backdrop Mastery:
Invest time in creating a seamless, truly black background. High-quality materials and proper mounting are critical to achieving the desired dramatic effect. - Lighting is Key:
Experiment with both hard and diffused lighting to determine the mood and level of detail you want to achieve. Hard light creates dramatic, high-contrast shadows perfect for emphasizing texture and form, whereas diffused lighting softens shadows and evenly illuminates your model. - Camera Control and Composition:
Master manual settings—aperture, ISO, shutter speed, and white balance—to perfectly expose your subject. Use focus stacking or meticulous focusing techniques for extreme close-ups and fine details. - Testing and Iteration:
Don’t rush. Take multiple test shots, review your histograms, and adjust continuously. The iterative process ensures that every element—from environmental control to composition—is refined before the final shoot. - Post-Processing Precision:
Fine-tuning in post-production is the last line of defense. Enhance contrast, correct exposure, and meticulously remove any imperfections while maintaining the integrity of your original vision. - Creative Exploration:
Every model is unique. Experimentation and creativity are as important as technical precision. Try different angles, lighting setups, and compositions to find the style that best highlights your craftsmanship. - Enhanced Accessories:
Incorporate non-reflective UV filters, lens hoods, and CPL filters to protect your lens, eliminate unwanted glare, and further enhance the clarity and detail of your images. - Document and Learn:
Keep detailed notes of your setup and settings. This personal “recipe” not only makes reproducing a successful shoot easier but also builds a knowledge base for tackling future projects.
11. Final Thoughts and Best Practices
Achieving a perfect black backdrop to showcase your scale model is an art as much as it is a technical challenge. Keep a log of your settings and adjustments; even minor changes can lead to significant improvements. Embrace experimentation as a way to refine your process, and remember that consistency in your shooting environment will lead to more predictable results.
By applying these detailed strategies—from pre-shoot planning and careful equipment selection, to advanced lighting techniques (including leveraging both hard and diffused light for creative effects) and the use of essential accessories like non-reflective UV filters, lens hoods, and CPL filters—you can transform every shot into a professional presentation of your hard work and creativity. Whether you’re a hobbyist or a professional, mastering these techniques will elevate your work and help your models truly stand out against the void.
Happy shooting, and may your scale models shine against the darkness!
Black void frames the art,
Sharp lights carve delicate lines,
Scale dreams bloom in dark.
James (Doc) Wooldridge
James is a dedicated scale modeller, researcher, and respected author with a deep passion for the craft. His meticulous approach brings exceptional detail and historical accuracy to every project. Renowned for his super-detailing techniques and authentic colour schemes, James has been featured on Scalemates and even in Google Featured Snippets. As an active contributor to a leading scale modelling Facebook community, he regularly shares innovative techniques and fresh perspectives. He also produces engaging video tutorials for a major scale modelling club and is an accomplished scale model photographer, presenting his work with professional polish. A founding executive of both KSM–IPMS and Kawartha Scale Modellers, James continues to shape and inspire the hobby through visionary leadership, creativity, and an unwavering commitment to excellence.💡📏 📐📱🎬 📷 🎥
© 2025: All Rights Reserved.


