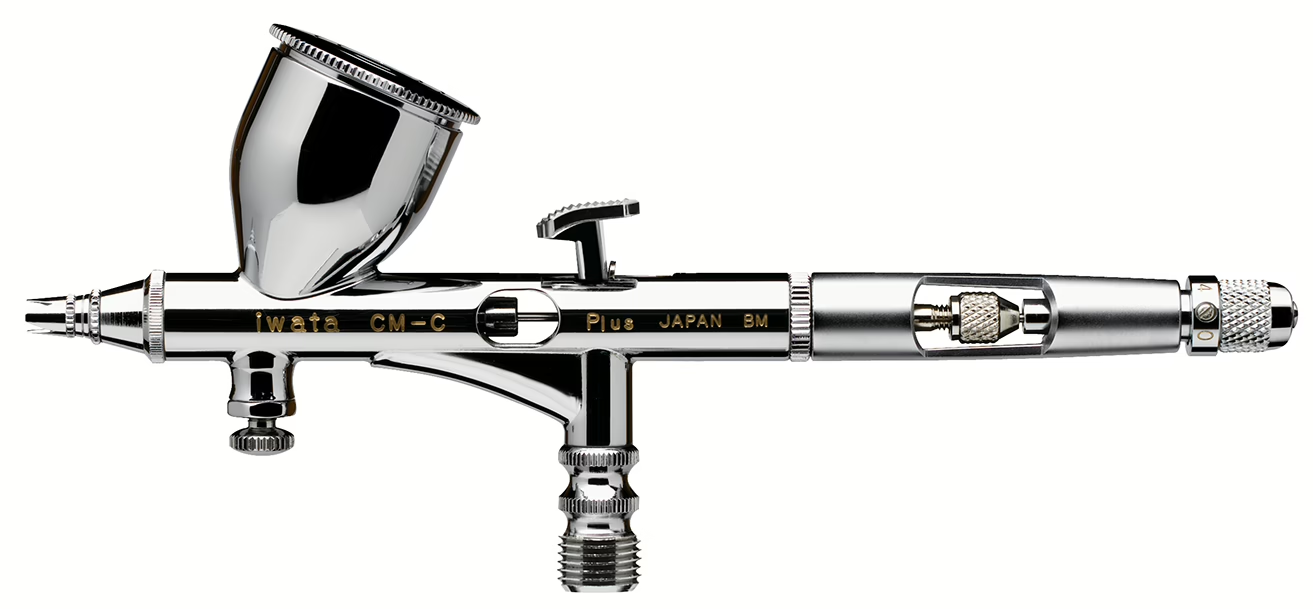
Unleash Precision: A Deep Dive into Airbrush System Mechanics
Airbrushing is both an art and a science, requiring mastery of the tools that bring creative visions to life. Even experienced modellers often grapple with misconceptions about how airbrush components work together. Misunderstandings around compressor pressure, hose flow, and the enigmatic MAC (Micro Air Control) valve can hinder performance and create frustration. This guide unpacks these elements, empowering you to harness your airbrush system with clarity and control.
1. Compressor Pressure vs. Hose Pressure
- Compressor Pressure: This term refers to the air pressure produced by the compressor, adjustable via its built-in regulator. The compressor’s gauge displays this pressure, which represents the maximum available force within the system. It acts as the baseline for your airbrushing setup.
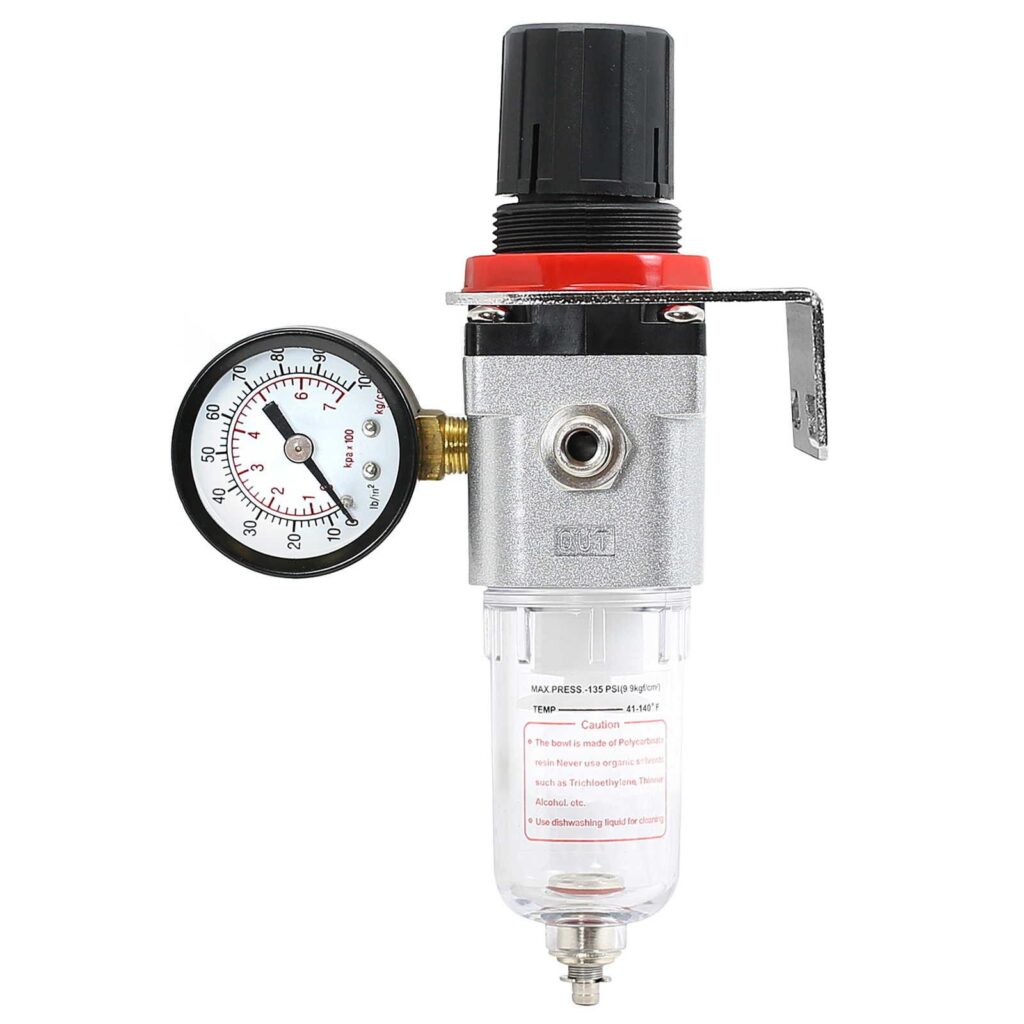
- Hose Pressure: This is the pressure that actually reaches the airbrush, transmitted through the air hose. Although regulated by the compressor, hose pressure may differ slightly due to factors such as hose length, internal diameter, and components like inline moisture traps, which introduce resistance.
Many modellers mistakenly assume that the pressure set on the compressor regulator is identical to what exits the airbrush. This assumption can lead to over-adjustments or inefficient settings.
Clarification: The Role of the MAC Valve
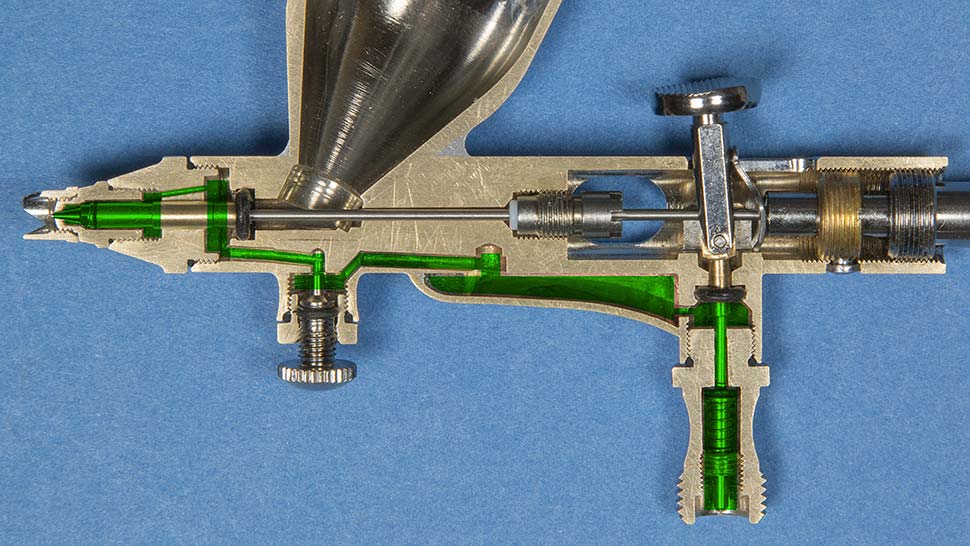
It’s important to clarify that the MAC valve does not alter air pressure within the compressor system. Instead, it regulates the flow of air exiting the airbrush nozzle. This distinction is crucial, as it underscores the MAC valve’s role in providing precise, localized control without impacting the overall system pressure.
2. MAC Valve and Airflow
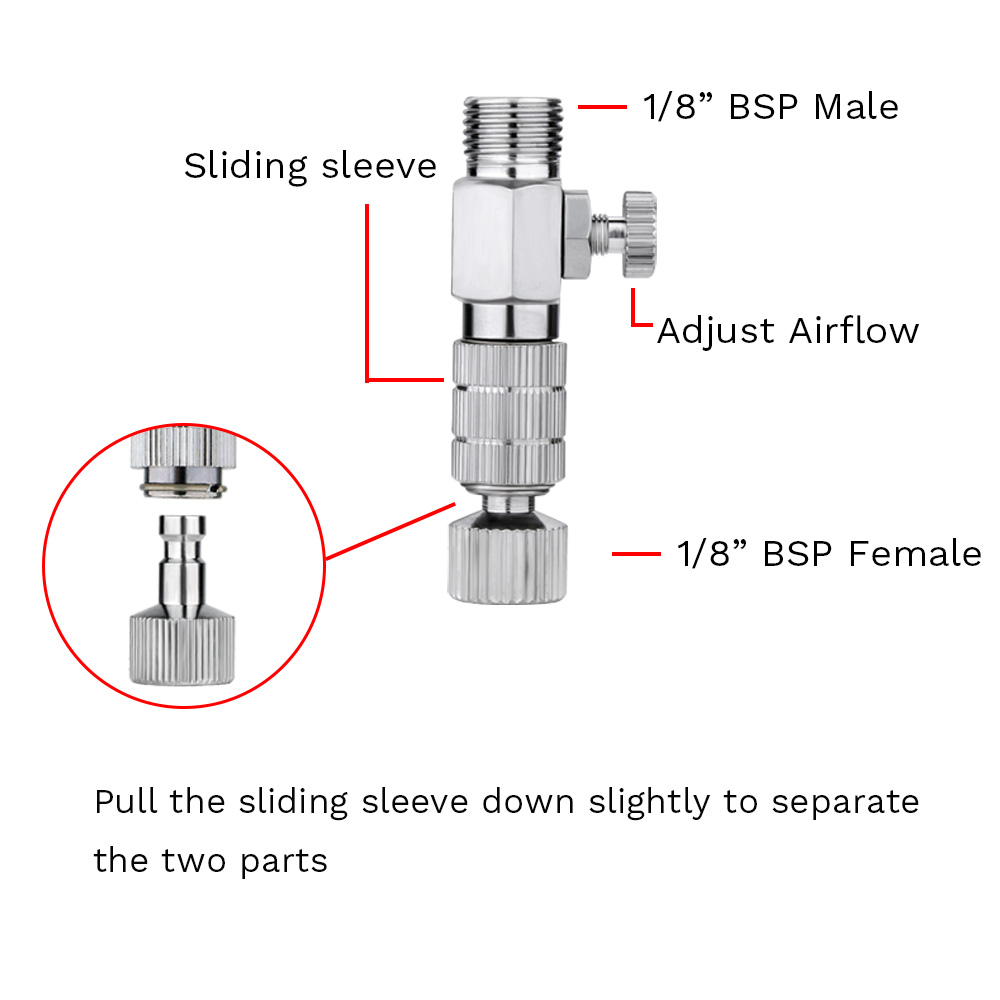
- Function of the MAC Valve: The MAC valve, located on the airbrush or inline near the air stem, allows precise airflow adjustments. It works by restricting the volume of air passing through the airbrush, controlling the effective pressure at the nozzle.
- Why Does the MAC Valve Output Feel Like “Blowing Through a Drinking Straw” on Your Wrist?
- When the MAC valve is partially or mostly closed, it significantly reduces airflow, creating resistance. This sensation is similar to the effort required to blow air through a narrow straw. While the system’s pressure remains unchanged, the reduced flow translates to softer, more controlled air output at the nozzle.
- Modellers often misconstrue this effect as a drop in compressor output, when in reality, it is a localized restriction introduced by the MAC valve.
- Optimal Usage of the MAC Valve: The MAC valve is ideal for achieving fine control, particularly for detailed or low-pressure applications. However, over-restricting airflow can lead to atomization issues, inconsistent spray patterns, or insufficient paint delivery.
3. MAC Valve and Highly Diluted Paint: 2 to ⧁9 Parts Thinner to Paint
The MAC valve is invaluable when working with highly diluted paints, as it permits a level of control that would be difficult to achieve using only the compressor regulator. Highly diluted paints require precise, gentle airflow to avoid over-spraying or causing runs on the surface. Reducing airflow with the MAC valve allows for:
- Improved Atomization: Lower airflow reduces turbulence at the nozzle, enabling fine droplets to form consistently, even with thin paint mixtures.
- Localized Application: With the MAC valve, you can spray close to the surface without risking oversaturation or splatter, essential for detailed work like shading or weathering effects.
- Adaptability: Adjusting the MAC valve in real time lets you maintain optimal spray patterns for various thinning ratios, offering versatility during complex projects.
Using only the compressor regulator to lower pressure often results in uneven or insufficient airflow, making it harder to manage diluted paints effectively. The MAC valve provides a dynamic, on-the-fly solution to these challenges, enabling superior control.
4. Common Sources of Confusion
- Terminology Overlap: Terms like “pressure” and “flow” are frequently used interchangeably but refer to different aspects:
- Pressure represents the force exerted by compressed air.
- Flow describes the volume of air moving through the system.
- Misunderstanding Adjustment Relationships: The compressor’s regulator and the MAC valve operate independently. Adjusting one does not have a direct, linear effect on the other, which can mislead inexperienced users.
- Feedback Misinterpretation: Reduced airflow from the MAC valve can feel like a drop in overall system performance, though this is simply the result of deliberate restriction at the airbrush level.
Practical Guidelines for Advanced Modellers
- Master the System: Develop a comprehensive understanding of how your compressor, air hose, and airbrush components interact. Reference user manuals and technical guides for advanced insight.
- Stage Calibration: First, set the desired baseline pressure on the compressor regulator. Use the MAC valve for nuanced, application-specific adjustments.
- Experiment and Evaluate: Test your setup on scrap material to observe how pressure and airflow variations affect paint atomization and application. Iterative experimentation fosters proficiency.
- Maintain Your Equipment: Routinely inspect and service your compressor, hoses, and airbrush for issues like leaks, clogs, or wear, which could undermine performance.
By recognizing the distinctions between pressure and airflow and leveraging the MAC valve effectively, experienced modellers can achieve unparalleled precision and consistency. Understanding these principles minimizes frustration and enhances control over airbrushing techniques.
With a well-calibrated setup and a deeper understanding of airbrush systems, you’ll not only elevate your technical skills but also unlock new creative possibilities. Take the time to experiment, refine, and enjoy the process of mastering your craft.

James (Doc) Wooldridge
James is a dedicated scale modeller, researcher, and respected author with a deep passion for the craft. His meticulous approach brings exceptional detail and historical accuracy to every project. Renowned for his super-detailing techniques and authentic colour schemes, James has been featured on Scalemates and even in Google Featured Snippets. As an active contributor to a leading scale modelling Facebook community, he regularly shares innovative techniques and fresh perspectives. He also produces engaging video tutorials for a major scale modelling club and is an accomplished scale model photographer, presenting his work with professional polish. A founding executive of both KSM–IPMS and Kawartha Scale Modellers, James continues to shape and inspire the hobby through visionary leadership, creativity, and an unwavering commitment to excellence.💡📏 📐📱🎬 📷 🎥

