Kawartha Scale Modellers • Bench Standard
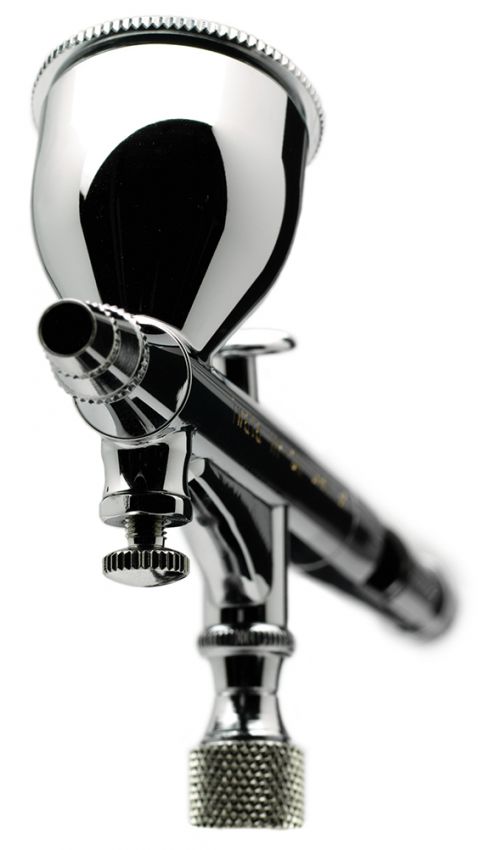
MAC Valve
Advanced airflow control for serious airbrushing.
A MAC Valve is not a gimmick, and it is not a substitute for learning how to airbrush properly. It is a precision airflow-control device mounted at the airbrush that allows the modeller to regulate the amount of air reaching the nozzle in real time. Used correctly, it gives tighter control over atomization, spray pattern, overspray, wetness, and edge behaviour than regulator pressure alone ever can.
That matters because fine airbrushing is not simply about low PSI. It is about controlling what the paint is doing at the point of discharge. A compressor regulator sets system pressure upstream. A MAC Valve lets you control delivered airflow at the brush itself. That distinction is everything.
For the serious modeller, that means sharper camouflage boundaries, cleaner mottling, tighter post-shading, more disciplined translucent work, less overspray, and better paint placement exactly where it is needed.
Bench Standard
A MAC Valve meters delivered airflow at the airbrush. It does not replace the regulator, and it does not replace skill.
TechNote
The regulator sets upstream system pressure. The MAC Valve trims air delivery at the brush itself, changing atomization behaviour in real time.
Failure Mode
A MAC Valve magnifies both good practice and bad practice. Poor paint reduction, poor trigger control, and poor distance discipline still fail.
What a MAC Valve actually does
A MAC Valve does not replace your regulator. It does not magically create skill. What it does is give you local control over air volume and delivery right at the airbrush, where that control matters most.
In practice, opening the valve allows more air through the brush. Closing it restricts the airflow. That change affects how aggressively the paint atomizes, how broad the spray cone becomes, how wet the paint lands, and how much the paint wants to spread beyond the intended target area.
The result is immediate control over:
- spray width
- edge sharpness
- overspray behaviour
- paint wetness on the surface
- trigger response in the fine-detail zone
This is why a MAC Valve matters. It lets the modeller trim the brush to the task instead of fighting a one-setting compromise.
Airflow control is not the same as pressure control
This is where many explanations go wrong.
A compressor regulator sets the pressure available in the system. A MAC Valve alters the airflow reaching the airbrush after that point. In other words, the regulator establishes the reservoir of available energy, while the MAC Valve meters how much of that energy is actually being used at the brush.
That is why a tanked compressor matters. The tank provides a stable reserve. The regulator sets a consistent working pressure. The MAC Valve then becomes a fine metering device, allowing the modeller to adjust the brush in real time without constantly walking back to the compressor or disturbing the upstream setting.
This is also why experienced users often run a stable system setting around 1.5 bar / 22 psi and then work the MAC Valve by feel. The goal is not to chase numbers. The goal is to trim airflow at the airbrush to suit paint reduction, needle size, spray distance, and the exact character of the line being sprayed.
Doctrine Note
A MAC Valve is not a second regulator in the casual sense modellers often describe it. It is a local metering device that changes the behaviour of the airbrush at the point of use.
The physics behind it
The MAC Valve makes sense when viewed through basic fluid dynamics.
At the nozzle, air velocity, pressure differential, and paint draw interact through Bernoulli’s principle and the Venturi effect. Faster-moving air lowers pressure at the pickup point and helps draw and atomize the paint. That atomized paint then exits as a spray pattern whose behaviour depends on airflow volume, paint viscosity, nozzle geometry, and trigger position.
The practical takeaway is simple:
More delivered air generally increases atomization energy, broadens the effective spray pattern, and can increase overspray or dry spray if the paint is too thin, the distance is too great, or the hand is too slow.
Less delivered air reduces the violence of atomization, tightens the working envelope, and can give extraordinary control for close-in detail work, but only if the paint is reduced correctly and the trigger hand is disciplined. Go too low and the brush can sputter, surge, or flood because the paint is no longer being carried and atomized cleanly.
That is why the MAC Valve is not a beginner convenience. It is an advanced control surface.
Why skilled users value it
A good MAC Valve changes the behaviour of the airbrush in the most important zone of trigger travel: the first small portion where detail lives.
That is where broad, clumsy airbrush handling ends and real precision begins.
With a MAC Valve, the modeller can:
- tighten the spray footprint without touching the compressor
- reduce overspray while working very close to the surface
- prevent spidering when using highly reduced paint
- keep metallics, filters, and translucent coats under tighter control
- tune the airbrush to changing conditions during a pass
The benefit is not theoretical. It is tactile. You feel it in the trigger. You see it in the edge. You recognize it in how much less correction work is needed afterward.
What it is not
A MAC Valve is not a cheat code.
It will not compensate for:
- badly thinned paint
- poor trigger control
- spraying too far from the surface
- moving too slowly
- unstable compressor output
- poor airbrush tolerances
- a damaged needle, nozzle, or cap
A MAC Valve magnifies both good practice and bad practice. In a disciplined setup, it is transformative. In a sloppy setup, it merely gives the user another variable to mishandle.
Built-in vs inline MAC Valve
There are two common arrangements: a built-in MAC valve on the airbrush itself, and an inline valve fitted at the airbrush air stem.
Built-in MAC Valve
A built-in MAC Valve keeps the package compact and convenient. It is always there, always ready, and can be extremely effective in capable hands. For users who know their brush well, it offers fast adjustments with minimal disruption.
Its advantage is simplicity.
Its limitation is that not all built-in valves offer the same range, feel, or refinement. Some are useful. Some are merely serviceable.
Inline MAC Valve
An inline MAC Valve mounted at the brush air stem is often the better engineering solution for users who want more adjustment range and finer control. It can offer a more deliberate feel, more usable travel, and, depending on the model, better repeatability.
Its advantage is precision and modularity.
Its limitation is that it adds complexity and puts another component into the chain, which means the rest of the setup must be equally sound.
For advanced users, inline systems often make more sense because they turn airflow control into a more tactile and more adjustable part of the tool rather than a convenience feature.
Why tolerances matter
The MAC Valve does not operate in isolation. It magnifies the mechanical quality of the airbrush it is attached to.
A brush with good tolerances, a true nozzle, a consistent needle, and stable trigger mechanics responds predictably to MAC adjustment. A mediocre brush does not.
This is why higher-end airbrushes tend to benefit more from MAC use. When the machining is good, the nozzle geometry is right, and the trigger linkage is clean, fine airflow adjustments become meaningful. When tolerances are loose, the MAC Valve cannot rescue the system from inconsistency.
The price difference is often in the tolerances.
Diagnostic Indicator
If MAC adjustment feels vague, erratic, or unrepeatable, the problem may not be the valve. It may be the airbrush itself.
Paint reduction and the MAC Valve
The MAC Valve only becomes truly useful when the paint is reduced properly.
If the paint is too thick, the valve cannot give finesse because the paint resists clean atomization. If the paint is too thin without proper air discipline, it will flood, spider, or break apart unpredictably. The MAC Valve sits in the middle of that equation, allowing the user to tune the airflow to the paint rather than forcing the paint to behave under a fixed air setting.
This is especially important when using highly reduced lacquer for translucent work. With correct reduction and local airflow control, the modeller can build colour slowly, preserve surface detail, and creep up on opacity rather than dumping paint onto the surface.
That is where the MAC Valve earns its keep.
Where it excels
A MAC Valve is most useful in the following situations:
Fine camouflage
German mottling, soft-edged disruptive patterns, and narrow spray lanes all benefit because the air can be trimmed to reduce spread and overspray.
Post-shading and value work
It allows the user to work close and controlled, nudging value without fogging the surrounding area.
Tight metallic work
Small metallic details, wheel running surfaces, wear bands, and precision highlights benefit from lower delivered air and careful trigger handling.
Translucent coats
When colour is being built as a film rather than as coverage, MAC control helps prevent flooding and lets the modeller creep up on the result.
Problem surfaces
Complex geometry, recesses, raised detail, and close-in work around masks all become easier when the spray footprint is under control.
How to use it properly
The proper sequence is not random.
First, establish a stable regulator setting at the compressor using a tanked system.
Second, reduce the paint correctly for the type of work being done.
Third, choose the appropriate needle/nozzle size.
Fourth, begin spraying with the MAC Valve more open than you think you need.
Then, while test spraying, reduce the airflow incrementally until the spray footprint tightens and the paint lands the way you want.
At that point, the work becomes tactile. The modeller balances:
- trigger pull
- paint reduction
- MAC position
- spray distance
- hand speed
That balance is the skill.
There is no single universal setting because the brush behaves differently with different paints, nozzle sizes, temperatures, humidity levels, and working distances. Anyone promising a magic MAC setting is selling fiction.
Failure Mode
Failure modes
Spidering
Usually caused by too much wet paint landing too fast for the surface or too much localized force for the reduction being used. The answer is not always less pressure. Often it is better paint discipline, less trigger pull, closer control of airflow at the brush, and faster movement.
Surging or sputtering
Often caused by airflow being closed down too far, poor paint reduction, partial clogging, or unstable delivery. The airbrush is no longer atomizing cleanly.
Dry spray
Usually caused by too much air, too much distance, or paint drying before it lands. The MAC Valve can help by trimming delivered air and keeping the work zone tighter.
Pooling
Usually caused by excessive trigger pull, slow movement, or trying to build opacity too quickly. The MAC Valve helps only when paired with restraint.
Doctrine Note
Practice is non-negotiable
The MAC Valve is a feel-based tool.
That matters because the real gains happen in the hand, not on paper. You learn where the brush starts to tighten. You learn how far you can reduce airflow before atomization becomes unstable. You learn what the trigger feels like when you are right on the edge of a clean, controlled line.
That cannot be learned by reading about it alone.
The fastest way to build MAC proficiency is through short, focused drills:
- spray parallel hairlines at close range
- practice dots without flooding
- feather a dark line into a soft transition
- build translucent passes without tipping into coverage
- deliberately explore the point where the brush begins to sputter, then back off
That is how muscle memory is built. That is how control becomes instinctive.
The real value of a MAC Valve
The real value of a MAC Valve is not that it gives you more adjustment.
It gives you meaningful adjustment where it matters most: at the airbrush, during the pass, while the paint is in motion.
That turns the airbrush from a blunt spray tool into a controllable instrument.
For advanced users, that difference is enormous. It is the difference between hoping a line lands correctly and placing it deliberately. It is the difference between managing overspray afterward and preventing it in the first place. It is the difference between broad approximation and disciplined paint placement.
A MAC Valve does not make a modeller skilled.
But in skilled hands, it unlocks a level of control that regulator-only spraying simply cannot match.


